Panotour - Interface - Import Livepano
Contents
![]() Panotour Pro only This feature is available only in the pro version of Panotour.
Panotour Pro only This feature is available only in the pro version of Panotour.
LivePano is a integrated add-on for Panotour Pro. With LivePano, you can merge videos to the equirectangular panoramas of your virtual tours.
Requirements, notes and useful links
Before starting your LivePano Import, please check you have all the required files:
- .Pano file: Autopano project file, used by Panotour to know where and how to position your video.
- Still images files (non stitched) for an equirectangular panorama (360°x180°).
- Video file.
- Single frame image file extracted from the video.
- How to extract a frame from video: You can use VLC Media Player. Open your video, go to Video > Take Snapshot and you get your snapshot on your desktop.
- How to extract a frame from video: You can use VLC Media Player. Open your video, go to Video > Take Snapshot and you get your snapshot on your desktop.
Check out these useful links:
- Read the FAQ for Livepano.
- Tutorial - Creating the ChaDian virtual tour with a Livepano
- Tutorial - Stitching a Livepano
- Livepano Troubleshooting
Notes:
Livepano is an Add-on for Panotour Pro and cannot be used without. It requires a to be used without watermarks, and the license must be under the same login as the Panotour Pro license.
You also need an Autopano Pro/Giga licence (version 3 minimum) to generate the .pano file required to import a Livepano.
Import Livepano
To import a LivePano, go to File > Import > LivePano (Ctrl+L).
To add multiple LivePanos, import them one by one, following the 5 steps described below.

Step One: External Resource Selection
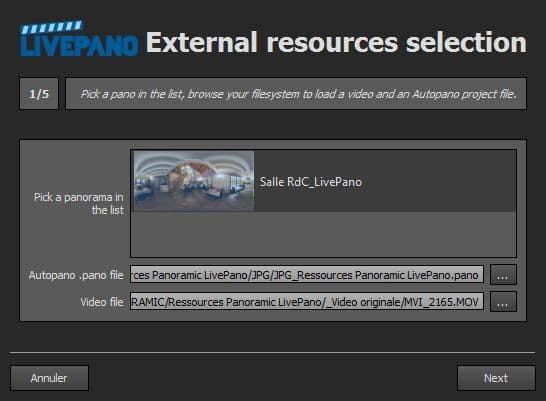
- Pick a Panorama in the List: Choose the panorama into which you want to insert the LivePano.
- Autopano .pano File: Select the Autopano .pano file by clicking on
 .
.
- Video File: Select the video file by clicking on .
- Cancel: Click this button to return to the project without any modification.
- Next: Click this button to validate your completion and go to the next step.
Step Two: Video frame selection
In this step, the .pano file is opened and you can select the video frame to tell Livepano where the video will be positionned.
Click Next when you selected the video frame.
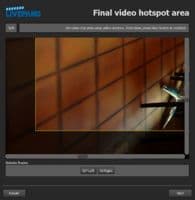
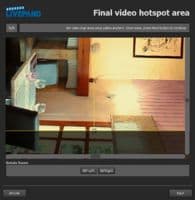
Step Three: Final video hotspot area
On this step you set the video crop area using the integrated yellow anchors available on the 4 corners and top, left, bottom and right center anchors.
To do this this you need to approximately know where the main content of your video takes place.
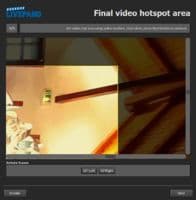
- To set your crop area, drag the anchors to match the main zone of your video.
- To move the video frame through the window, drag it with the mouse.
- Video is always centered, don't try to drag the entire crop area, only anchors are draggable.
- Crop area is always symmetrical in comparison with the horizontal and verticals centered yellow guides.
- 90° Left and 90° Right: Click these button to rotate the entire video area. This function does not rotate the video (no processing), it only rotate the display.
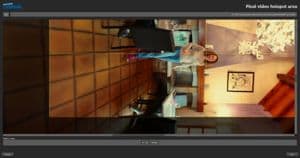
Step Four: Blending mask

In this step you will draw a polygon around your subject and use the adjustments tools in order to merge the video as seamlessly as possible.
Tools
- Reset Mask or Escape: Cancel and reset the drawn polygon.
- Spacebar: Close your polygon.
- Mask Smoothness: Adjusts feathered edge of your polygon.
- Show Polygons: Checkbox to show/hide the polygon drawn.
- Preview Display Types:
- Display Video Only: Displays only the video in the preview window.
- Display Panorama Only: Displays only the panorama in the preview window.
- Display Blend (Panorama+Video): Displays both panorama and video in the preview window with the video into the drawn polygon.
- Contrast: Adjust the contrast of the video.
- Brightness: Adjust the brightness of the video.
- Gamma: Adjust the gamma level of the video.
Drawing Your Polygon
- Set Display Video Only.
- Click by click on the video preview area, draw your polygon. Tap the Escape key or Click «Reset Mask» to reset the mask. Press your spacebar to close the polygon.
- Set Display Blend (Panorama+Video).
- Set Contrast, Brightness, Gamma and Mask Smoothness to adjust the merging seamlessly if needed.
How to get the best video merge results
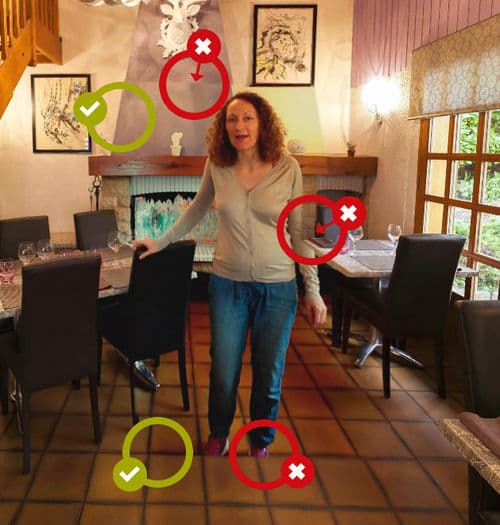
- Draw the polygon along the edges of the highly contrasted zones (desk corners, the wall, etc...).
- Don't draw on the main zone of the video where subject is supposed to move.
If the video and panorama do not align correctly, you will have to go back to Autopano to check your stitching. See Livepano Troubleshooting.
Step Five: Render
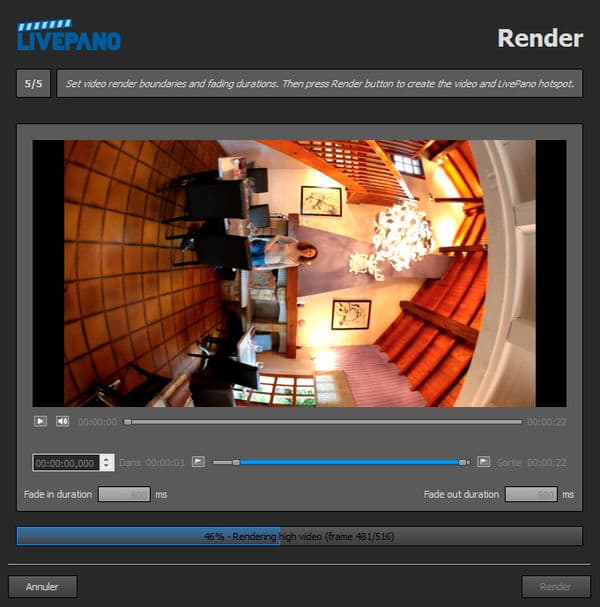
At this step you set boundaries and fading options of your video.
-
 Click to toggle Play/Pause.
-
 Hover this icon and drag
  to adjust Sound Level.
-
 Click to set Start Point of your video to the current time, or move the left cursor
  .
.
- Click to set End Point of your video to the current time, or move the right cursor

- Fade In Duration: Enter time in milliseconds you wish for fade in.
- Fade Out Duration: Enter time in milliseconds you wish for fade out.
- Render: Click this button to render the video.
- Finish: Click to finalize your LivePano import and see it appear as a hotspot on your tour.
Note:
On iPhones only, LivePano will be displayed in fullscreen mode and not seamlessly integrated into the sphere. For more information, see viewing limitations on mobiles.
BACK TO: Documentation / Panotour Documentation