Panotour - Notions - Understanding a built Virtual Tour
Contents
- 1 Intro
- 2 Contents
- 2.1 HTML file
- 2.2 Data folder
- 2.2.1 Panorama name folder(s)
- 2.2.2 Group name folder(s)
- 2.2.3 Graphics folder
- 2.2.4 Lib folder
- 2.2.5 Sounds folder
- 2.2.6 Spots folder
- 2.2.7 Floorplan folder
- 2.2.8 TOUR.js and TOUR.swf
- 2.2.9 TOUR.xml
- 2.2.10 TOUR_vr.xml
- 2.2.11 TOUR_core.xml
- 2.2.12 TOUR_core_vr.xml
- 2.2.13 TOUR_messages_en.xml
- 2.2.14 TOUR_skin.xml
- 2.2.15 TOUR_skin_vr.xml
- 2.2.16 thumbnail.jpg
- 3 Cleaning up the tour data
- 4 Uploading your tour
- 5 Updating your uploaded tour
Intro
When you build a tour, it's not a single file, but several files and folders that must all be uploaded on your server, without changing the files organization or hierarchy.
This page will break down the different elements that are part of a built virtual tour, and explain how each part is used.
Understanding this can be useful for when you upload a tour, and especially if you re-upload one, and have only done a few modifications. This will help you avoid re-uploading an entire tour instead of the few single files that have actually been modified.
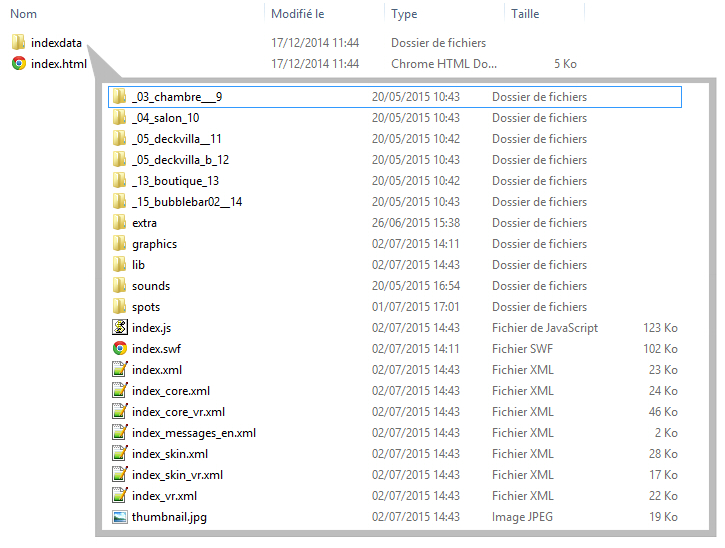
Once you've built a tour, in build folder you can find:
- TOUR.html file
- TOURdata folder
- Panorama-name folder(s)
- Group-name folder(s)
- Graphics folder
- Lib folder
- Sounds folder
- Spots folder
- Floorplan folder
- TOUR.js and TOUR.swf
- TOUR.xml
- TOUR_vr.xml
- TOUR_core.xml
- TOUR_core_vr.xml
- TOUR_messages_en.xml
- TOUR_skin.xml
- TOUR_skin_vr.xml
- thumbnail.jpg
Example of built tour:
Contents
HTML file
This is the file that you launch your tour from, whether it's locally or online.
It contains the HTML5 elements of the webpage with :
- The meta-datas displayed when you share your tour on the web (on Facebook for example)
- The links and scripts tags to get internal libraries
- The script for device detection and orientation for mobile devices
- The default CSS rules for the webpage and the viewer integration
- The embed script of the HTML5 and/or Flash viewer
Data folder
This data folder contains, as the name implies, all the data that your tour needs to function. Without these, it will not work once uploaded.
Panorama name folder(s)
The folder name is composed of your scene's name (from the initial build, if you change it after that the folder name will not change), and at the end the panoID number. There will be a separate folder for each panorama in your tour.
In this folder, you will find all the tiles have been generated for your panorama.
If you use multi-resolution, the loading time and viewing resolution will be vastly improved for your tour, but these folders will be heavier as they will contain many more tiles.

Group name folder(s)
This folder serves as a place-holder for the organisation of your tour into groups. In this folder, you will find the custom thumbnail you may have set for a group, if you have set one in Panotour, but will otherwise be empty.
Graphics folder
In this folder, you will find all the graphical resources and images your tour uses. This concerns images used for buttons, logos, images on the interface in general. You will also be able to find here the scripts and assets used by the various plugins in your tour.
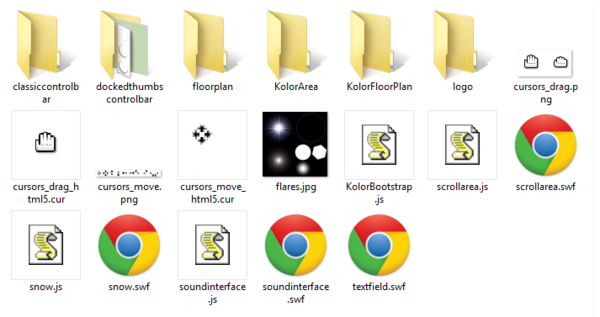
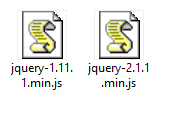
Lib folder
In this folder, you will find the jQuery and Kolor libraries (for fullsceen, browser detection, language, etc...) used by the HTML file and the HTML5 plugins.
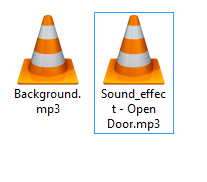
Sounds folder
In this folder, you will find all the sound files that have been used in your tour.
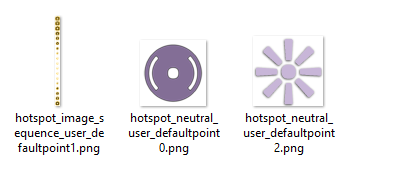
Spots folder
In this folder, you will find all the hotspot images that have been used in your tour. This goes for the hotspot icons that come with Panotour and your own custom ones..
Floorplan folder
In this folder, you will find your floorplan(s) image(s).
TOUR.js and TOUR.swf
These files are the engines behind the HTML5 and Flash players of your tour.
The tour will be viewed through the HTML5 player by default, with the option of keeping the Flash player as a fallback.
The benefits of building your tour with the Flash Player incorporated are:
- Support of features that the HTML5 player does not yet support (list here)
- Support of older browsers that may not support HTML5
Note: Your tour can not be viewed from the .swf file on it's own.
Even if you incorporate the Flash Player to your tour, you must always launch it from the HTML file outside of the data folder, as this file will not have access to any of the tour's HTML5 or Javascript features. Panotour does not create standalone .swf tours.
TOUR.xml
This xml contains all of your tour's organisation, so the group and panorama's parameters (FOV, projection, etc..) and information.
TOUR_vr.xml
This xml is an alternate version of the TOUR.xml file, but specifically calibrated to be used in VR mode by excluding the unsupported or unnecessary parts of the tour.
TOUR_core.xml
This xml contains all of your tour's initialisation variables and core features (actions, events...).
Changes to this file can affect the tour's stability.
TOUR_core_vr.xml
This xml is an alternate version of the TOUR_core.xml file, but specifically calibrated to be used in VR mode by excluding the unsupported or unnecessary parts of the tour.
TOUR_messages_en.xml
This xml contains all of the text used for descriptions, tooltips, etc... They are all regrouped into this one file.
If you add language codes to the Build tab of your tour, several files will be created for your to incorporate translations of your tour. See the documentation on Tour Languages.
TOUR_skin.xml
This xml contains all the parameters for the plugins you've added to your tour.
TOUR_skin_vr.xml
This xml is an alternate version of the TOUR_skin.xml file, but specifically calibrated to be used in VR mode by excluding the unsupported or unnecessary parts of the tour.
thumbnail.jpg
This thumbnail is the thumbnail of first panorama of your tour or a custom image if you set one in your project project, and is shown when you share your tour on Facebook or Google + for example.
Cleaning up the tour data
If, while you were building your tour, you tried various plugins, panoramas, adding some, removing some, trying out different graphics... All of these files (except their actions or variables in the xml) will still be present in your tour, even after you've removed them from Panotour.
To save up on space, it's best to remove those files, because they won't be of any use to your tour. To do this, you have two options:
- Option 1: Using the Project File Manager:
Use the Project file manager to clear up your tour from unnecessary data.
By using this tool, Panotour will detect which files in your build folder are not relevant to the current project, select them, and give you the possibility of permanently deleting them.
If you store your source panoramas and other files in this folder, this tool will also consider them as unnecessary to your tour's functioning. Make sure you un-check them before deleting the files, as they are permanently deleted and not sent to your recycle bin.
- Option 2: Rebuilding the tour entirely in a new folder
Create or select a new folder in the Build tab to build the tour in, and build.
By doing this, you can be sure that your tour will only contain the elements of your project as it is currently opened in Panotour. This can however take a while if your tour is large and contains many panoramas/gigapixels.
Uploading your tour
Now that you've built your tour, and understand how each element works, you have to upload your tour to a web server so that you can integrate it on a website. You will generally have one supplied with your website or internet service provider, but you will also find many free and paying servers with a quick web search, like Amazon S3.
- 1. Uploading the tour
Uploading the tour is simple, you need a web server. Then, all you need to do is place the tour and all of it's contents on your server. You can do this manually, or by using an FTP client.
For an example of uploading a tour, have a look at the page hosting on Amazon Simple Storage Servers (S3) if you don't have any web hosting.
- 2. Accessing the tour
Now that you've uploaded the tour on your server, all you need to do is get the public link for the tour's HTML file. That's it!
Share it as is, or see the next step if you want to embed it on a webpage.
- 3. Integrating the tour on your webpage
The recommended method of integration of a tour on your website is by using an iFrame, so you would use this code and place it on your webpage, replacing the url with your own:
<iframe src="http://WWW.MY-DOMAIN.COM/VIRTUAL_TOUR/MY-TOUR.html" width="800" height="600" allowFullScreen></iframe>
More information on our Web Publishing page.
Updating your uploaded tour
The following question is something that anyone who has built a virtual tour has probably asked themselves at least once:
I've uploaded my entire tour. Now that I've modified a few things, do I have to re-upload it ALL?
The answer being, no. You do not have to re-upload everything.
Generally, all you will need to re-upload or update if you have modified anything in your tour are the XML files (any change to your tour will affect one or several of the XML files), so it is best if you simply reupload all of the .XML, .JS and .HTML files and any of the folders corresponding to your changes:
- Graphics folder, if you have added/changed any graphical elements or plugins.
- Sounds folder, if you have added/changed any sounds.
- Spots folder, if you have added/changed any spots.
- Floorplan folder, if you have added/changed any floorplans.
- Panorama-name folder(s), if you have added/changed any panoramas to your tour.
- Group-name folder(s), if you have added/changed any groups to your tour.
BACK TO: Documentation / Panotour Documentation