Panotour - Advanced - HTML Templates
Contents
Introduction
On this page, we will learn how the use different Panotour Pro HTML templates can improve the user experience thanks to the web design. This part requires web design HTML, CSS and JS skills.
The benefits of a custom HTML template are:
- Improved interactions: Trigger actions outside the virtual tour HTML container
- Better user experience
- Unlimited customization and creativity of the final web page containing the tour
- A more responsive interaction for small screen devices.
How to add an HTML Template
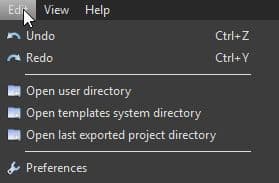
Panotour Pro HTML template files are placed into the Panotour Pro user directory. To browse your user directory, go to Edit > Open User Directory
You can add as many HTML template files into this directory as you want.
Open your file explorer, the file path will look like:
C:\Users\username\Documents\Kolor\PanotourPro 2\html
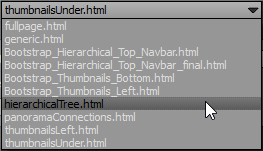
This directory is empty by default. Once added, your custom HTML template files and the default template files appear in the drop-down menu located in the Build Tab > HTML Template
How to create an HTML template for Panotour
For the moment, the most secure way to create your own template is to start from one of the existing files in the Panotour Pro Program directory. The path to the HTML files should look like this:
C:\Program Files\Kolor\Panotour Pro 2.1\Resources\html

Examples of Custom HTML Templates
These HTML templates are no longer required as they are now included in the complete application.
Download
Deprecated: here are a few examples of custom HTML Templates (until Panotour Pro 2.5.13 version).
These HTML templates are no longer required as they are now included in the complete application..
Click the links in bold to download them:
- The_Expander_2016_01.zip contains a plugin that must be added to your tour, that allows your templates to interact with your tour information.
- Bubbles.zip contains a plugin that must be added to your tour, that allows your templates to interact with your tour information.
- Html_Custom_Templates.zip contains a plugin that must be added to your tour, that allows your templates to interact with your tour information, and 3 templates demonstrating the flexibility of the Panotour engine, and 3 responsive designs based on Bootstrap:
- Bootstrap External Commands with Colors.zip contains a plugin that must be added to your tour, that allows your templates to interact with your tour information, in this case the project colors, and 3 responsive HTML templates which use your project's colors:
- Bootstrap External Commands Wall 2016.zip contains a plugin that must be added to your tour, that allows your templates to interact with your tour.
- AdvancedPanoramaList.zip to build an advanced panorama list of your tour's contents, useful for deep-linking.
- Find_Pano.zip to use as a base to create your own template incorporating the possbility to search panoramas in the tour.
- Find_Spot.zip to use as a base to create your own template incorporating the possbility to search spots in the tour.
Note: the versions here are for the latest version (beta, release-candidate or stable) of Panotour that is available. If you are using an older version, consult the Download Archives.
Installation
The following templates require an additional plugin called "Bootstrap_External_Commands" to work properly, which is included into the download .zip.
- Unzip the content of the archive into the Panotour User directory (Edit > Open User Directory)
- Start or restart Panotour
- Remember to always include the Bootstrap_External_Commands plugin into each project exported with these templates. Otherwise your tour will not work properly.
- Select the template you wish to use in the Build Tab > HTML Template menu chooser.
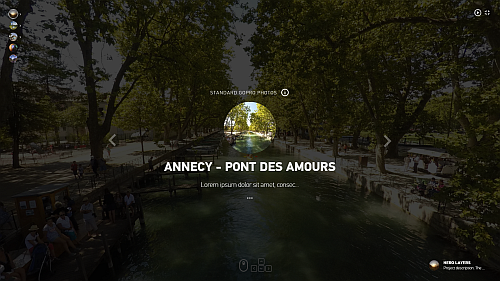
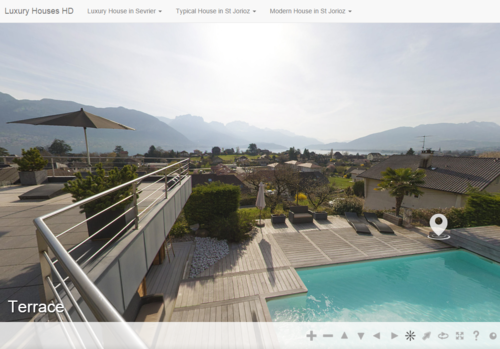
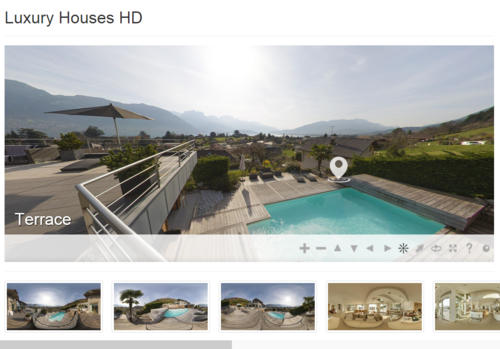
The Expander
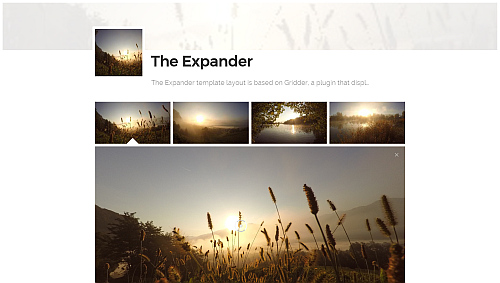
The Expander template layout is based on Gridder, a plugin that displays a thumbnail grid expanding preview similar to the effect on Google Images.
- Fully responsive: The Expander is a fully responsive Panotour template that supports standard, panoramic, full 360-degree images, standard videos and 360-degree videos into one single project. The template is fully functional by itself.
- Groups: Scene groups are organized by sections of thumbnails. Each group contains:
- Group thumbnail with group title.
- If group description is available, a toggle button appears on the group title line.
- Group description is hidden by default
- The toggle group description button toggles the group description text.
- Scenes thumbnails of the group
- Individual scenes: Scenes not embedded into a group are organized into their own separated section.
- Project name and description: Project name, description and credits are positioned at the bottom of the page. The header contains:
- The project name.
- The project thumbnail.
- A short version of the project description (without HTML).
- When the user clicks on the short description, the page automatically scrolls to the footer to read all the project informations.
- Autotour supported: When Autotour is enabled in the project properties, the grid automatically opens the first scene of the project.
- Deep linking: Each scene has its own URL: You can easily grab the link of the current scene you are watching and share the link.
- Fullscreen support: The Expander template supports fullscreen experience: If fullscreen feature is enabled in the Panotour project (via plugins or hotspots), the scene can be viewed in fullscreen mode.
- Author link: The Expander template supports the Author name and link.
- Standard photos: Both spherical and planar projections are nice to display. For planar you don't have to choose a horizontal field of view but for spherical projection, it is highly recommended to adjust field of view according to the focal length. Example of input field of view properties with a GoPro camera:
- Sperical Projection
- Input field of view 140.00° horizontal
- Input field of view 105.00° vertical
- Input field of view 0.00° vertical offset
- Panoramic images: The Expander template supports panoramic images with any field of view. Setting the projection type depends on your feelings! Just take care to set the right projection type and field of view.
- Standard videos: Add standard videos as you are used to do with standard images: Set planar projection instead of spherical and it is ok.
- 360-degree videos: This template supports 360° videos. Simply add your 360 video content as other medias and take care it is assigned as a spherical scene in the scene properties.
Download
View demo
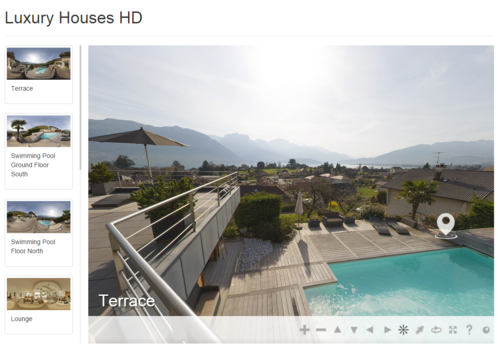
Bubbles
- A fully responsive Panotour template based on scroll jacking technique to deliver a full page experience.
- Multiple Media: Bubbles supports standard, panoramic, full 360-degree images, standard videos and 360-degree videos into one single project.
- Hotspots and additional plugins are optional, the template is fully functional by itself.
- Navigation Bubbles: At the top left of the page, thumbnail bubbles represent scenes/groups and are organised according to the project/group order. A little arrow on the right means it is a group with at least one scene. Just hover the thumbnail to expand the group menu.
- Deep Linking: Each scene has its own URL: You can easily grab the link of the current scene you are watching and share the link.
- Layer Mode: Displays the current scene information (thumbnail, title, short description). You see the virtual tour behind a semi-transparent black layer. Use your scroll wheel or click on the arrows to navigate through groups or scenes. Scenes into a group are ordered horizontally. Scenes that are not into a group are ordered vertically according to the project order.
- Scene Mode: This is the scene of the virtual tour. You can move into the sphere, left right, up and down. At the bottom of the page you have commands to return to Layer Mode or go to next/previous scene. Navigation bubbles are still available in this mode to quickly access any scene. At the bottom right of the page you always get the information of the currently viewed scene. On click, you go to the layer mode, at the position of the current scene.
- When Autotour is enabled: Automatically starts in scene mode.
- In scene mode, click on Pause toggles to layer mode and stops autorotation.
- In layer mode, click on Play toggles to scene mode with autorotation.
- Click on Pause stops autorotation only.
- A toggle to layer mode stops autotour and autorotation.
- When Autorotation is enabled/disabled: Automatically starts in layer mode. Click on Play/Pause toggles autorotation only.
- Standard Photos: Both spherical and planar projections are nice to display. For planar you don't have to choose a horizontal field of view but for spherical projection, it is highly recommended to adjust field of view according to the focal length.
- Example of input field of view properties with a GoPro camera
- Spherical Projection
- Input field of view 140.00° horizontal
- Input field of view 105.00° vertical
- Input field of view 0.00° vertical offset
- Example of input field of view properties with a GoPro camera
- Panoramic images: Bubbles supports panoramic images with any field of view. Setting the projection type depends on your feelings! Just take care to set the right projection type and field of view.
- Standard Videos: Add standard videos as you are used to do with standard images and set planar projection instead of spherical and it is ok.
- 360-degree Videos: This template supports 360° videos. Simply add your 360 video content as other medias and take care it is assigned as a spherical scene in the scene properties.
- Bubbles is suitable for small projects with few interactions.
Download
View demo
Generic Templates
Generic Hierarchical Tree - Template
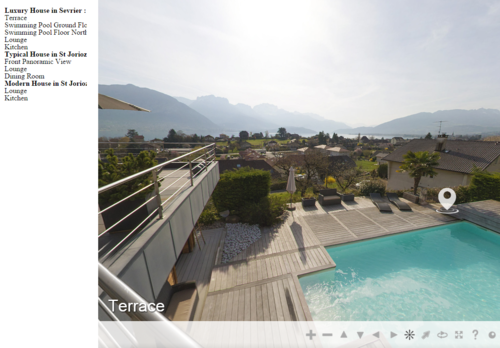
- A two columns template with a small left column on the left containing the groups and the panoramas links.
- A main column displaying the virtual tour.
- This template is a basic customization but demonstrates the flexibility of the Panotour Pro template engine.
Download
View demo
Generic Thumbnails Left - Template
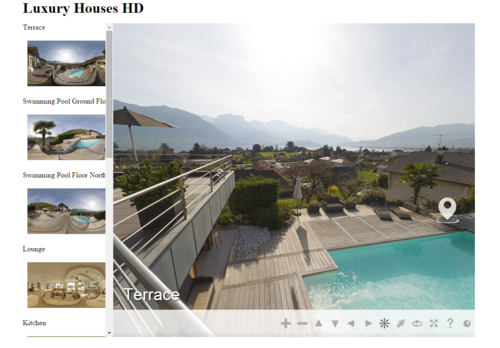
- A two columns template with a small left column on the left containing the thumbnails and the panoramas titles that link to the virtual tour.
- A main column displaying the virtual tour.
- This template is a basic customization but demonstrates the flexibility of the Panotour Pro template engine.
Download
View demo
Generic Thumbnails Under - Template
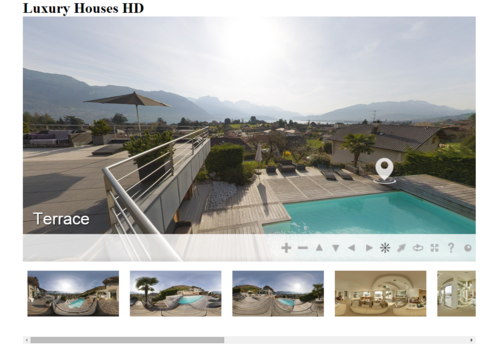
- A single column template with a bottom row containing the thumbnails that link to the panoramas in the virtual tour.
- A main column displaying the virtual tour.
- This template is a basic customization but demonstrates the flexibility of the Panotour Pro template engine.
Download
View demo
Bootstrap based Templates
- A responsive design based on Bootstrap
- A simple full page design with a responsive top navigation bar that link to the panoramas in the virtual tour.
Download
View demo
Bootstrap Thumbs Left - Responsive
- A responsive design based on Bootstrap
- A page design with a responsive left column containing the thumbnails that link to the panoramas in the virtual tour.
- Resize your browser to see the responsive design working: Left column disappear on small devices to be replaced by a top navigation bar.
Download
View demo
Bootstrap Thumbs Under - Responsive
- A responsive design based on Bootstrap
- A page design with a responsive bottom row containing the thumbnails that link to the panoramas in the virtual tour.
- Resize your browser to see the responsive design working: Bottom row will disappear on small devices to be replaced by a top navigation bar.
Download
View demo
Bootstrap based Templates with Project Colors
Here is a small collection of responsive templates based on the project colors (Project Properties > Display > Colors).
Bootstrap Full Page with Project Colors - Responsive
- A responsive design based on Bootstrap
- This responsive template is based on the project colors.
- The tour is displayed in a full page mode with the control bar above.
- Responsive top navigation bar.
- Depending to the foreground and background colors of your project, results may be completely different.
- The control bar is customized by the template.
- You can toggle the thumbnails bar on and off.
- Drag the thumbnails bar with your mouse.
- The info button displays a modal box with the current panorama title, description, breadcrumb and group description.
- Controls: Previous Next panoramas, Start Stop autorotation, Zoom in and out, Show Title and Description, Show Help, Toggle Thumbnails, Toggle Fullscreen
Download
View demo
Download
View demo
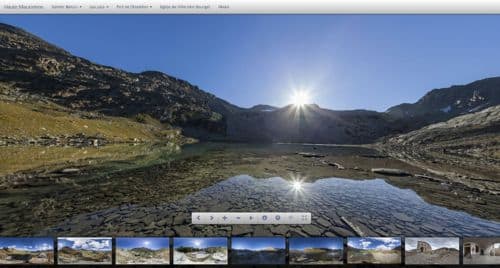
Bootstrap Light on Dark with Project Colors - Responsive
- A responsive design based on Bootstrap
- This responsive template is based on the project colors.
- Intended to be used with a clear foreground color and a dark background color.
- The tour is displayed in a container in the left of the page with thumbnails bar and control bar under the tour.
- The control bar is customized by the template.
- You can toggle the thumbnails bar.
- Drag the thumbnails bar with your mouse.
- Title of the current panorama is displayed on the right.
- Breadcrumb on the right with Current Project / Current Group / Current Panorama.
- Tabs with Panorama Description / Group Description / Project Description
- Controls: Previous Next panoramas, Start Stop autorotation, Zoom in and out, Show Title and Description, Show Help, Toggle Thumbnails, Toggle Fullscreen
Bootstrap Light on Dark Template intended to be used with a light foreground color and a dark background color
Download
View demo
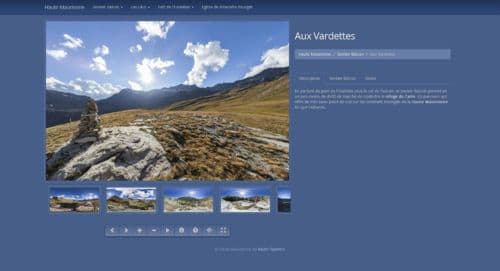
Bootstrap Dark on Light with Project Colors - Responsive
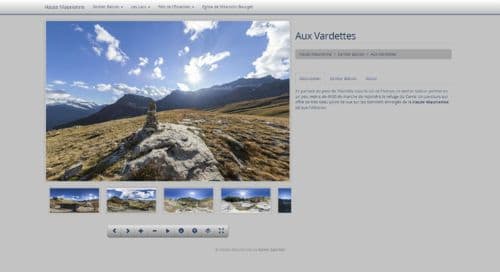
- A responsive design based on Bootstrap
- This responsive template is based on the project colors.
- Intended to be used with a dark foreground color and a clear background color.
- The tour is displayed in a container in the left of the page with thumbnails bar and control bar under the tour.
- The control bar is customized by the template.
- You can toggle the thumbnails bar.
- Drag the thumbnails bar with your mouse.
- Title of the current panorama is displayed on the right.
- Breadcrumb on the right with Current Project / Current Group / Current Panorama.
- Tabs with Panorama Description / Group Description / Project Description
- Controls: Previous Next panoramas, Start Stop autorotation, Zoom in and out, Show Title and Description, Show Help, Toggle Thumbnails, Toggle Fullscreen
Bootstrap Dark on Light Template intended to be used with a dark foreground color and a light background color
Download
View demo
Bootstrap Wall with Project Colors - Responsive
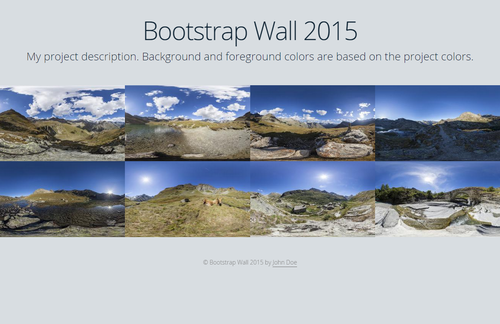
- A responsive design based on Bootstrap
- This responsive template is based on the project colors.
- Resize your browser to see the responsive design working.
- An overlay above the tour containing all the thumbnails.
- Click on the thumbnails to close the overlay and view the tour.
- When you are in the tour, a topbar contains a button to go back to the thumbnails and the panorama title.
- This example contains the Previous Next Strips Plugin to navigate between the panoramas.
Download
View demo
Debug - Advanced Panorama List
This template is not a tour template, but rather an advanced template which will list all the direct links to your panoramas for deeplinking.
It will generate a panorama list file with the panorama thumbnails, panorama name, panoID (both with their deep-link URL) and the panorama description. For panoramas in groups, the group colour is used in the background.
To get the panorama list, follow these instructions precisely:
- Build your tour as you normally would with your usual, preferred template.
- Once you have finished building your tour, go to the Build tab and select the AdvancedPanoramaList template and build the tour.
- Your tour's html file will be re-generated with this list in it's place. Open the built tour's folder and rename the html file, for example "panoList.html".
- Back in Panotour, select your preferred template again and re-build the tour.
BACK TO: Documentation / Panotour Documentation