Panotour - Tour - Hotspot editor - Hotspots
Contents

This page describes the different types of hotspots that you can use in the hotspot editor.
Add Polygon 
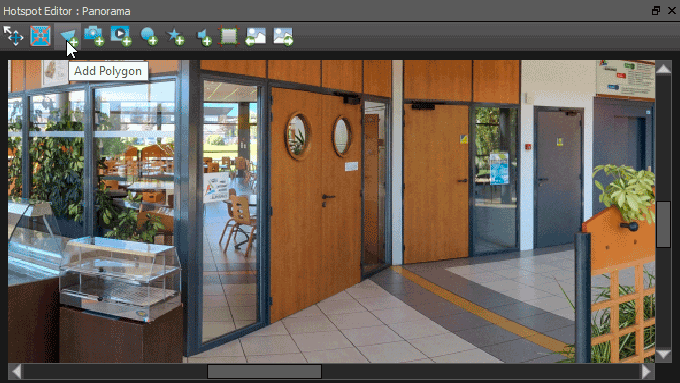
This tool is useful for doors, gates, etc. You can cut out a zone to make it reactive to an user action like hover and/or click.
- For more accuracy, navigate and zoom (mouse wheel) to make your cut-out zone occupy the largest preview without crop.
- Click on the icon
- Trace your selection cut-out around the zone you wish to be a hotspot. You can use as much as points you want.
- Complete your cut-out by clicking on the first point you placed.
- You have now a yellow area surrounded by red dots which is your polygon hotspot.
- You can edit your points by clicking on it and dragging it.
- Learn more about Polygon Spot Style.
Polygon Spot Compatibility
- Polygon spot is not compatible with VR mode and is replaced with your default point spot style.
Add Picture 
First Step: Selection
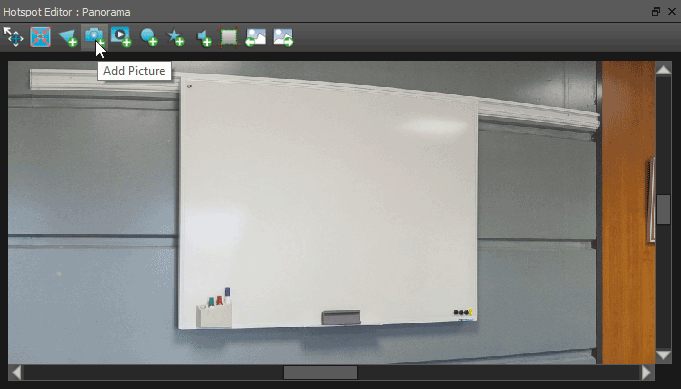
This 4-points tool places a picture into your sphere. The Add Picture hotspot tool is useful for example when you need to replace a frame on the wall like the example. See also Picture Spot Style.
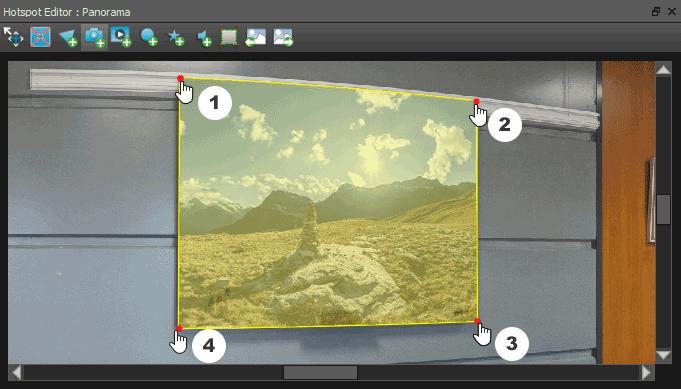
- This tool always needs 4 points.
- The first point you place defines the top left corner of the picture you place. Then you can orientate your picture as you need, like placing it horizontally, vertically, from top, from bottom, etc.
- Place the 3 first point freely around the frame you wish to cut out.
- The 4th point auto snaps to points that match at less 2 parallel opposites lines. You may see your draw lines not straight, that's completely normal and in relation with sphere projection. Once region is cut out, you can assign a picture, a tooltip and a description.
Second Step: Properties
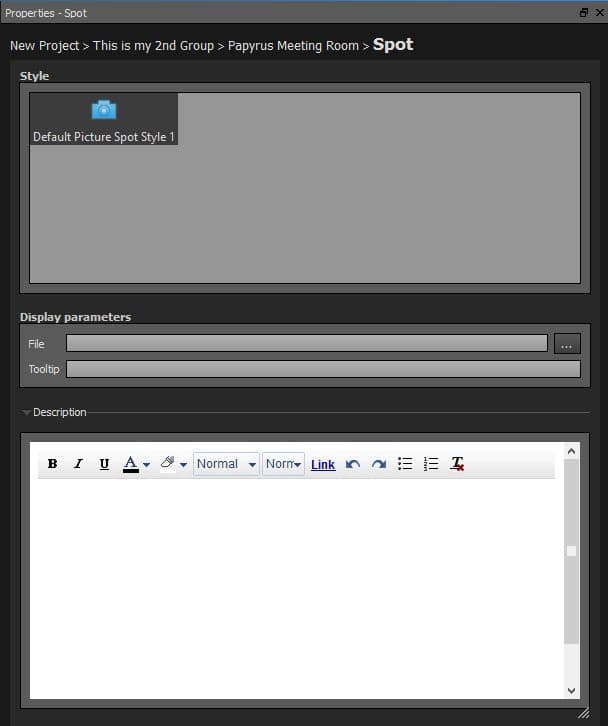
Style
Click to assign a style to your Picture hotspot. You can add and customize your own style for this hotspot. See also Picture Spot Style.
Display Parameters
- File: Select the image file you wish to display in the selected aera. Supported image file type is *.png, *.jpg, *.jpeg, *.gif and Flash files are *.swf are supported.
- Tooltip: Information displayed when visitor hovers the hotspot. You can enter any information you wish to display.
Action parameter
May appear in relation with Actions assigned in Style Tab.
 Description
This field can be displayed in different ways. Even if description field is completed, you may not see it appear unless you call it through an action. To learn more about actions, see Plugins in the Style tab. Description contains a built in WYSIWYG Editor that can customize and add HTML features to your text like:
- Text formatting and style (Bold, Italic, Underline, Color, Font Family, Font Size).
- Enhanced text (Links, Unordered Lists, Ordered Lists).
- Undo/Redo function.
- Remove formatting function.
Picture Spot Compatibility
- Some of the picture spot properties are not compatible with VR mode.
- Rectangular hotspots (image, video, web content) are only supported in the standard projection, viewing with the non-standard projections (architectural, fisheye, etc) the placement will not be precise.
Add Video 
First Step: Selection
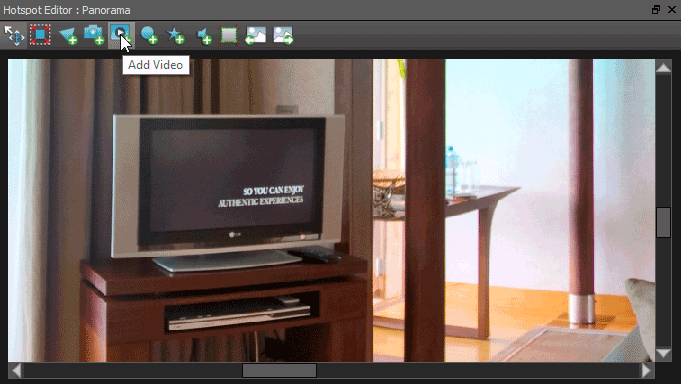
This 4-points tool places a video into your sphere. The Add Video hotspot tool is useful for example when you need to place a video on a TV like on the above example. See also Video Spot Style.
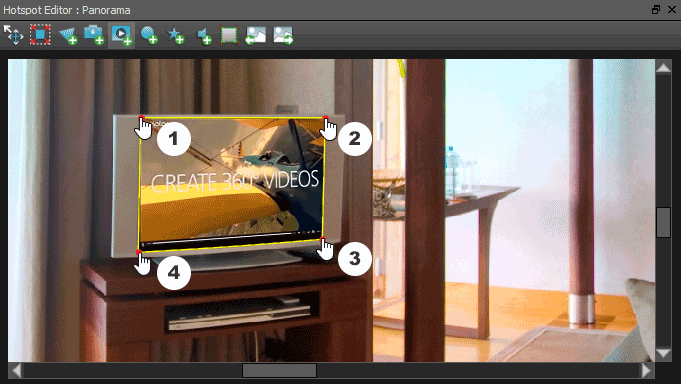
- This tool always needs 4 points.
- The first point you place defines the top left corner of the video you place. Then you can orientate your video as you need, like placing it horizontally, vertically, from top, from bottom, etc.
- Place the 3 first point freely around the frame you wish to cut out.
- The 4th point auto snaps to points that match at less 2 parallel opposites lines. You may see your draw lines not straight, that's completely normal and in relation with sphere projection. Once region is cut out, you can assign a video, a tooltip and a description.
Second Step: Properties

Style
Click to assign a style to your Video hotspot. You can add and customize your own style for this hotspot. See also Video Spot Style.
Display Parameters
- File: Select the video file you wish to display in the selected aera. Supported video file type is *.mp4, *.m4v, *.flv, *.webm, *.ogg, *.ogv
- Note: .flv is a Flash-only format
- Note: .mov format is unsupported.
- Tooltip: Information displayed when visitor hovers the hotspot. You can enter any information you wish to display.
- Sound track for iPhone: Add a separate soundtrack file for your video, required for iPhones.
Action parameter
May appear in relation with Actions assigned in Style Tab.
Description
This field can be displayed in different ways. Even if description field is completed, you may not see it appear unless you call it through an action. To learn more about actions, see Plugins in the Style tab. Description contains a built in WYSIWYG Editor that can customize and add HTML features to your text like:
- Text formatting and style (Bold, Italic, Underline, Color, Font Family, Font Size).
- HTML features for enhanced text (Links, Unordered Lists, Ordered Lists).
- Undo/Redo function.
- Remove formatting function.
Video Spot Compatibility
- Video spot is not fully compatible with VR mode.
- Note that directional video sound is not compatible with the HTML5 Player.
- Rectangular hotspots (image, video, web content) are only supported in the standard projection, viewing with the non-standard projections (architectural, fisheye, etc) the placement will not be precise.
Add Web Content 
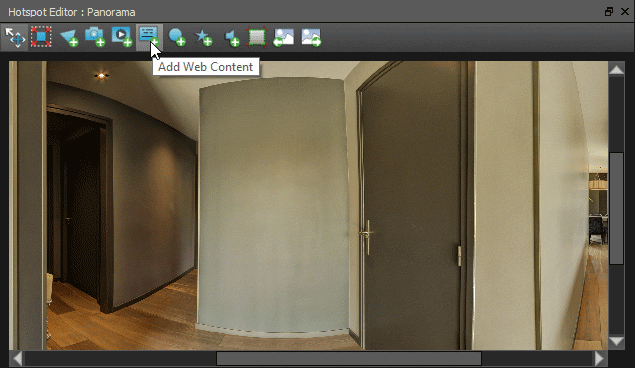
New feature in Panotour v2.5: Now you can embed a web page - or any external content accessible via an URL - into the sphere.
First Step: Selection
- This tool always needs 4 points.
- The first point you place defines the top left corner of the web content you place. Then you can orientate your web content as you need, like placing it horizontally, vertically, from top, from bottom, etc.
- Place the 3 first point freely around the frame you wish to cut out.
- The 4th point auto snaps to points that match at less 2 parallel opposites lines. You may see your draw lines not straight, that's completely normal and in relation with sphere projection. Once region is cut out, you can assign a web content.
Second Step: Properties
- Display parameters
- URL: Enter the URL to display into the web content spot.
Note:
- To display a hosted video in the web content spot, for example from YouTube, you need to use the embed URL, not the page URL. You can find that URL by looking for the embed code on the video's page, and in that embed code you will find the embed URL which is different from the page URL.
- For example: To use this video in your web content spot, click on "Share" underneath the video, then "Embed". Copy the code into a notepad, and retrieve the embed URL in the middle of the code.
- The page URL is https://www.youtube.com/watch?v=AgqdB1B6Jpo
- The embed URL is: https://www.youtube.com/embed/AgqdB1B6Jpo
- Note the difference is highlighted in bold, but depending on the website the embed URL may differ.
- For example: To use this video in your web content spot, click on "Share" underneath the video, then "Embed". Copy the code into a notepad, and retrieve the embed URL in the middle of the code.
- You can use a custom html page in a webcontent spot, you will have to add it yourself to the built tour folders though.
- To link to a custom HTML file you can use a relative path such as:
- If they are in same directory, the url would be like this : ./myHtmlFile.html
- If they are in a sub directory, the url would be like this : ./mySubDir/myHtmlFile.html
- If you want to put your HTML files elsewhere, in a upper directory, you should use double dots : ../mydirectoryOverTheDirectoryOfthetour/myHtmlFile.html
- To link to a custom HTML file you can use a relative path such as:
Web Content Spot Compatibility
- Web content spot is not compatible with VR mode.
- Web content spot is removed on iOS due to an Apple limitation.
- Rectangular hotspots (image, video, web content) are only supported in the standard projection, viewing with the non-standard projections (architectural, fisheye, etc) the placement will not be precise.
Add Point 
Selection
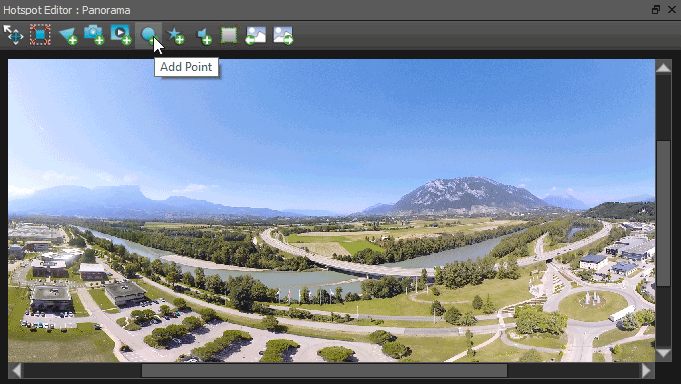
This is the basic hotspot tool, probably the most used too. By default, the action parameters are set to navigation through pictures/panoramas/groups, but you can assign your own action on it and create as much as styles you want. See also Point Spot Style. Click to add a point and assign an action to go for it:
Properties

Style
Click to assign a style to your point hotspot. You can add and customize your own style for this hotspot. See also Point Spot Style.
Display Parameters
Enter a tooltip that can be seen when visitors hover the hotspot.
Action Parameters
By default this section displays the navigation actions between panoramas and groups but this section is dynamic and may display others settings in relation with the point hotspot style.
- A Panorama: Select the target panorama you wish to link to the hotspot.
- A Group: Select the target group you wish to link to the hotspot.
See also Actions.
Target View
This section is available only when «A panorama» is selected.
- Default Target View: The target view is applied when your visitor land on the target picture/panorama.
- Custom View: You can specify a target view position on the target picture/panorama by dragging it to the position you wish in the preview window.
Note: Default View and Custom View are overridden on mobile if using the Gyroscope.
Source Transition
When checked, source transition uses only the following parameters and bypasses the point style.
- None: On click, go directly to the target even if a default action is defined in point style.
- Zoom In on the Spot: Add a «Zoom In» effect to the hotspot point and then go to the target.
- Zoom Out: Add a «Zoom Out» effect and then go to the target.
Target Transition
When checked, target transition uses only the following parameters and bypasses the point style.
- None: Landing on the target, no action is run on the target panorama even if an action is defined in point style.
- Custom View To Panorama View: Go to the target with custom view first and pan to the panorama view (defined in the target panorama).
- Load Custom View: Go to the target custom view.
- Load Panorama View: Go to the target panorama view (defined in the target panorama).
- Panorama View To Custom View: Go to the target with panorama view first(defined in the target panorama) and pan to the custom view.
Description
This field can be displayed in different ways. Even if description field is completed, you may not see it appear unless you call it through an action. To learn more about actions, see Plugins in the Style tab. Description contains a built in WYSIWYG Editor that can customize and add HTML features to your text like:
- Text formatting and style (Bold, Italic, Underline, Color, Font Family, Font Size).
- Enhanced text (Links, Unordered Lists, Ordered Lists).
- Undo/Redo function.
- Remove formatting function.
See also Point Spot Style.
Add Lens Flare 
Selection
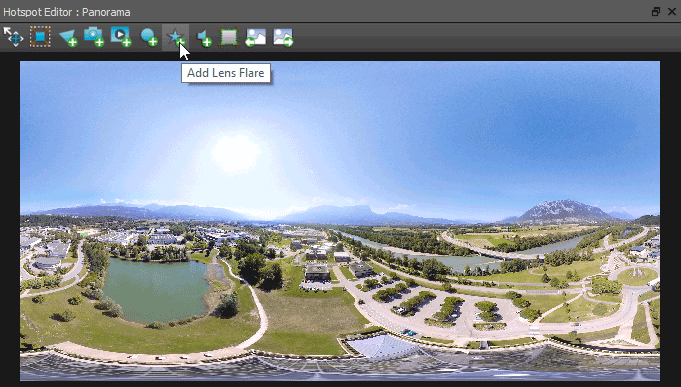
This is an effect hotspot tool that adds lens flare effect to your sphere on the point you click. This is recommended to set it on the sun but you can place it wherever you want and as much as you want.
Properties
They are no parameters available for the lens flare hotspot.
Lens Flare Compatibility
Note that lens flare is not compatible with HTML5 Players. Lens flare is not compatible with VR mode.
Add Sound 
First Step: Selection
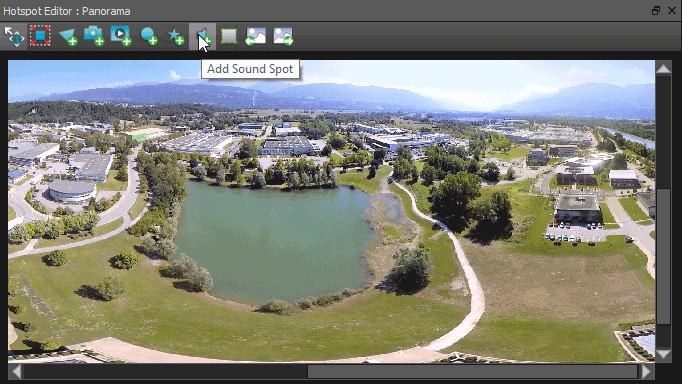
allows you to add Directional Sounds on the place you want on your current sphere. This hotspot is "invisible", you can only hear it when the sound hotspot is in your visitor's viewport. The sound respects the stereo field and the volume. When user drags the sphere with a sound hotspot into the zone, a realistic volume and stereo effect is heard according to the user movements, as it would be in a real situation. You can make your own sound hotspots with the style feature. See also Directional Sound Spot Style.
Second Step: Properties
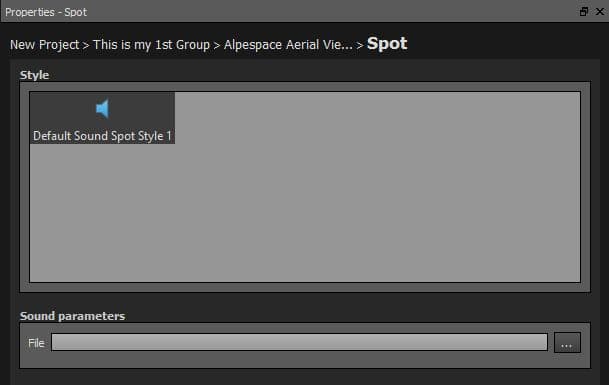
Style
Click to assign a style to your Sound hotspot. You can add and customize your own style for this hotspot. See also Directional Sound Spot Style.
Sound Parameters
Select the sound file you wish to use. Supported sound file format is .mp3
Sound Spot Compatibility
Note that directional sound is not compatible with HTML5 Players.
BACK TO: Documentation / Panotour Documentation