Panotour - Tour - Hotspot editor
Contents

The hotspot editor is the tool that manages interactions between scenes and groups in your tour. Each scene gets its own hotspots. You can:
- Add clickable and customizable zones or points of interests with tooltips and hovering features. You can add as many hotspots as you want.
- Add point spots. This type of hotspot is the most common, it can be customized to fit plenty of needs: Open panoramas, images, videos, websites and many more because you can assign any actions on it.
- Add pictures into your sphere/projection. You define a zone and pictures added will be included in your sphere/panorama. You can add as many image hotspots as you want.
- Add videos into your sphere/projection. Define a zone with your mouse and make your sphere come live by adding supported videos. You can add as many video hotspots as you want.
- Add web content. New in Panotour v2.5. You define a zone into which you embed a web page or any external content accessible via an URL. You can add as many web content hotspots as you want (May increase page load time).
- Add lens flare. Simulation tool that add a lens flare effect on the point you click in the sphere. You can add as many flare hotspots as you want.
- Add sound. Add a sound file hotspot. When user drags the sphere with a sound spot into the zone, a realistic volume and stereo effect is heard according to the user movements, as it would be in a real situation. You can make your own sound hotspots with the Spots Style feature. You can add as many sound hotspots as you want.
You can add hotspots to:
- Scenes with the default Hotspot Editor
- Floor Plans with the Floor Plan Hotspot Editor.
- The Web Map with the Web Map Hotspot Editor.
The Toolbar

- Select

Manage movements and selections in your preview. In this mode you can drag your picture/panorama with left click down and select your hotspots to edit them. - Fullscreen

Click on this icon to toggle the hotspot editor fullscreen. - Add Polygon
 :
:
Use this tool to make a cut-out of a portion of your sphere and assign an action on visitor click. Learn more about Polygon Hotspot and Polygon Spot Style. - Add Picture

Use this 4-points tool to place a picture into your sphere. This tool always needs 4 points. You can place the 3 first point freely but the 4th point auto snaps to points that match at less 2 parallel opposites lines. You may see your draw lines not straight, that's completely normal and in relation with sphere projection. Once region is cut out, you can assign a picture, a tooltip and a description. Learn more about Picture Hotspot and Picture Spot Style. - Add Video

Use this 4-points tool to place a video into your sphere. This tool always needs 4 points. You can place the 3 first point freely but the 4th point auto snaps to points that match at less 2 parallel opposites lines. You may see your draw lines not straight, that's completely normal and in relation with sphere projection. Once region is cut out, you can assign a picture, a tooltip and a description. Learn more about Video Hotspot and Video Spot Style. - Add Point

This is the basic tool, probably the most used too. Click to add a point spot and assign an action to go for it:- Go to a panorama.
- Go to a group.
- Assign transition effect.
- Assign target picture/panorama transition view.
- Assign a style.
- Learn more about Point Hotspot Editor and Point Spot Style.
- Add Web Content

A web content spot is user defined zone into the sphere that displays a web page or any external content that is accessible via an URL. The web content spot uses a 4-points tool to place the web content into the sphere. This tool always needs 4 points. You can place the 3 first point freely but the 4th point auto snaps to points that match at less 2 parallel opposites lines. You may see your draw lines not straight, that's completely normal and in relation with sphere projection. Once region is cut out, you can assign a web content URL. Learn more about Web Content Spots - Add Lens Flare

This is an effect hotspot tool that adds lens flare effect to your sphere on the point you click. This is recommended to set it on the sun but you can place it wherever you want and as many as you want. - Add Sound

allows you to add sounds on the place you want on your current sphere. This hotspot is "invisible" for your eyes, you can only hear it when the sound hotspot is in your visitor's viewport. Adjustments are available in the style tab. Learn more about Sound Hotspot and Directional Sound Spot Style. - Crop

The crop tool does not crop your image file but limit the viewport of your sphere. - Previous

Select previous picture/panorama. - Next

Select next picture/panorama.
Low and High Resolution Panorama
This feature is an optimization and speed feature available since Panotour v2.1. In Panotour 2.1 and higher, the .kpt projects integrate two resolutions for each panorama (included in the .cache file in the same directory of your project).
This new feature increases drastically the loading time and the smoothness in the Hotspot Editor. By default, when you select a panorama on the Main Workspace (clicking on it), the Hotspot Editor displays the low resolution version of it.
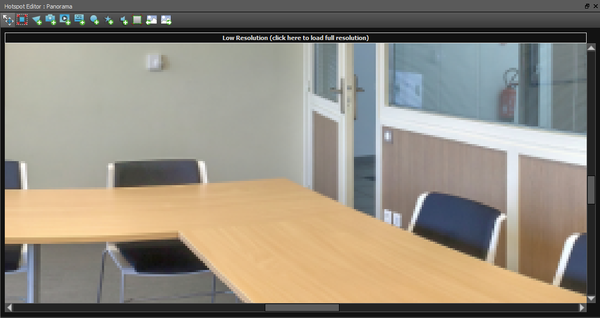
- Low Resolution (click here to load full resolution):
- Displayed by default, this is a small size (4000x2000 pixels) of your original panorama that is built from the original in order to work quickly and smoothly even in huge panoramas.
- For most of panoramas, working with the low resolution of your panoramas is sufficient to work properly.
- In the case of your hotspots require more cutout or placement accuracy, you can toggle the resolution to full/native simply by clicking on the button. Then, Panotour loads your original file and you have to wait until the panorama file is loaded.
- When toggled to High Resolution, the current panorama is used in high resolution until the current project is closed.
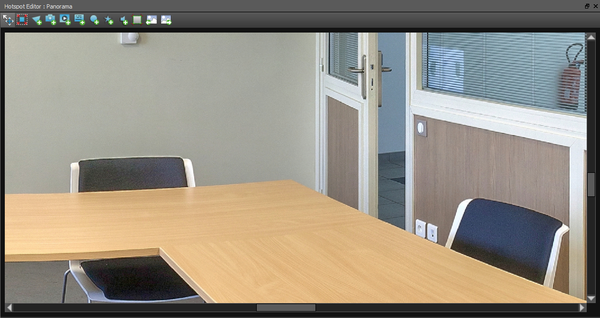
- High Resolution:
- This is the full/native resolution of your panorama.
- The high resolution is enabled if you click on «Low Resolution (click here to load full resolution)».
- The high resolution is intended to be used on panoramas that require high accuracy for hotspot placement and cutouts, and needs to be loaded if you plan to export the cube faces or the panorama in File > Export..
- Once activated, the high resolution version is enabled until the current project is closed.
Select
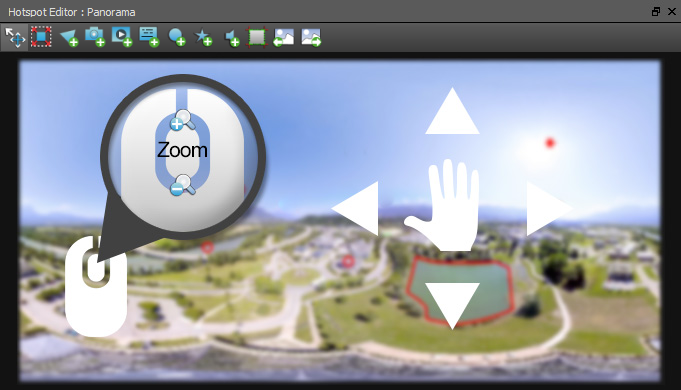
Basic tool used for navigating the scene, and selecting and editing hotspots properties.
- You can drag your picture/panorama maintaining left click down.
- You can zoom in and zoom out with your mouse wheel.
- Select hotspots by clicking on it. Once clicked, properties and parameters of hotspots (polygon, points, images, videos) are displayed on the right properties window. See each hotspot type for more information.
Fullscreen
Click on this icon to toggle hotspot editor display in fullscreen mode. Once in fullscreen mode, click ![]() to toggle back in windowed screen mode.
to toggle back in windowed screen mode.
Crop
The crop tool does not crop your image file but limit the viewport of your sphere.
- On 360° field of view: You can only edit top and bottom crop, it is useful when you don't want the nadir and/or the zenith to appear.
- On less than 360° field of view: You can edit top, right, bottom and left crop values.
Note:
There is a "trick" to crop the right and left values in a 360° panorama: Change the input field of view of your panorama from 360° to 359°, then de-select the panorama and select it again to refresh it's properties. You will be able to crop your left and right values and then set the input field of view back to 360°.
The Gyroscope bypasses this setting, so if you view the tour on mobile with the gyroscope active, you will be able to see the cropped areas, because there is no way to stop your viewer from looking at those areas.
Previous
When you click you go to the previous picture/panorama based on the order defined in the group or project. To select a different order, go to the Group Properties or Project Properties and re-order as you wish.
Next
When you click you go to the next picture/panorama based on the order defined in the group or project. To select a different order, go to the Group Properties or Project Properties and re-order as you wish.
Keyboard Shortcuts
- Ctrl+F: Fullscreen
- M: Move
- L: Polygon
- P: Picture
- S: Point spot
- V: Video
- C: Crop
- W: WebContent
- Left/Right: Previous/Next Scene
For a full list of keyboard shortcuts, see here.
BACK TO: Documentation / Panotour Documentation