Panotour - Style - Actions
Contents
- 1 Introduction
- 2 Basic
- 3 Animation
- 4 View Control
- 4.1 Enter WebVR
- 4.2 Enter fullscreen mode
- 4.3 Exit fullscreen mode
- 4.4 Switch fullscreen mode
- 4.5 Enable gyroscope
- 4.6 Disable gyroscope
- 4.7 Set «Move To» control mode
- 4.8 Set «Drag To» control mode
- 4.9 Zoom in
- 4.10 Zoom out
- 4.11 Move up/down
- 4.12 Move left/right
- 4.13 Look to
- 4.14 Set normal projection
- 4.15 Set fisheye projection
- 4.16 Set architectural projection
- 4.17 Set stereographic projection
- 4.18 Set pannini projection
- 4.19 Set Little Planet projection
- 4.20 Set fisheye ball projection
- 5 Interface Control
- 5.1 Show Hotspots
- 5.2 Hide Hotspots
- 5.3 Show Tour Controls
- 5.4 Hide Tour Controls
- 5.5 Show Tour Thumbnails
- 5.6 Hide Tour Thumbnails
- 5.7 Display tour information
- 5.8 Hide tour information
- 5.9 Show Map
- 5.10 Hide Map
- 5.11 Show Floor Plan
- 5.12 Hide Floor Plan
- 5.13 Share tour
- 5.14 Play tour sounds
- 5.15 Stop tour sounds
- 5.16 Set volume of tour sounds
- 6 Advanced
- 7 Actions and Plugins Connection Table
- 8 Plugin Specific Actions Sets [Plugin] «Plugin Name»
Introduction
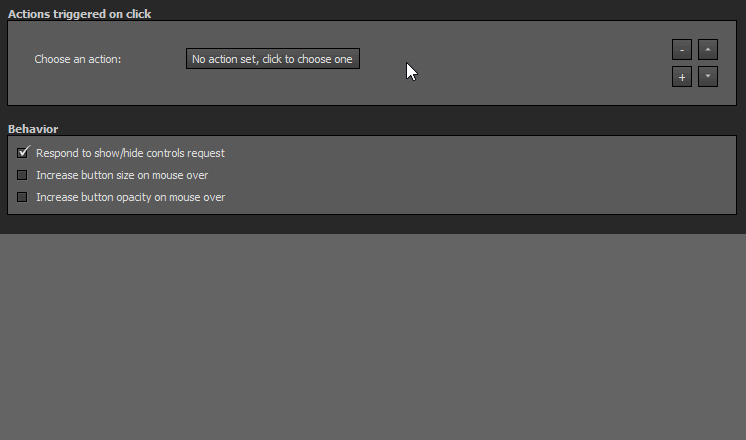
Panotour Pro actions are events that are triggered by user click. Actions define interaction behaviors between the main interface tools (Go to, Move, Autorotation, etc) and plugins.
You can add multiple actions to plugins. However, it is recommended not to add to many actions once because it may be obtrusive for the user.
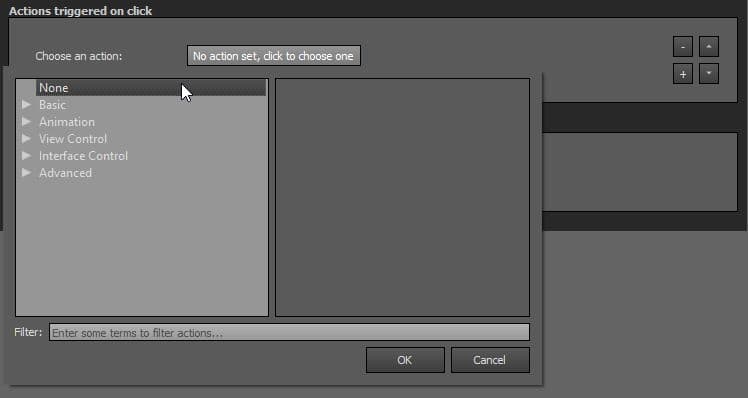
Basic
None
No action is set to the plugin.
Go to a panorama or a group
Load a specific panorama or the first panorama of a specific group.
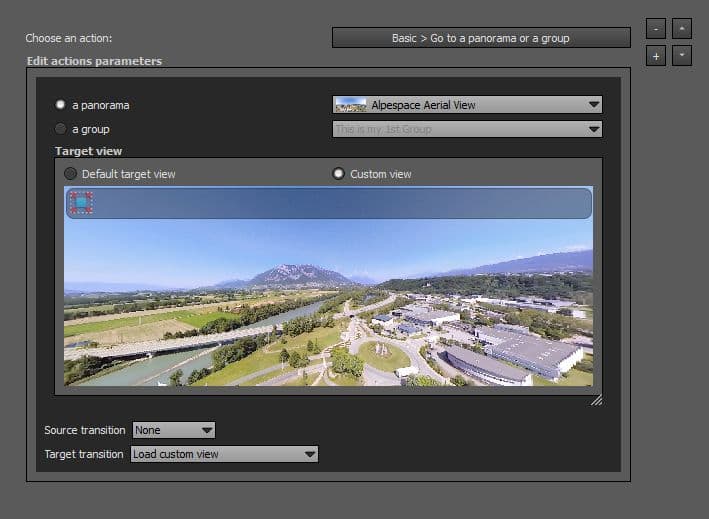
Action Parameters
- A Panorama: Select the target panorama you wish to link.
- A Group: Select the target group you wish to link.
Target View
This section is available only when «A panorama» is selected.
- Default Target view: The target view is applied when your visitor land on the target picture/panorama.
- Custom View: You can specify a target view position on the target picture/panorama by dragging it to the position you wish in the preview window.
Note: Default View and Custom View are overridden on mobile if using the Gyroscope.
Source Transition
- None: On click, go directly to the target.
- Zoom Out: Add a «zoom out» effect and then go to the target.
Target Transition
When checked, target transition uses the following parameters.
- None: Landing on the target, no action is run on the target panorama.
- Custom View To Panorama View: Go to the target with custom view first and pan to the panorama view (defined in the target panorama).
- Load Custom View: Go to the target custom view.
- Load Panorama View: Go to the target panorama view (defined in the target panorama).
- Panorama View To Custom View: Go to the target with panorama view first (defined in the target panorama) and pan to the custom view.
Note: Default View and Custom View are overridden on mobile if using the Gyroscope.
Display an image
Display a image or a Flash file (*.swf) in a modal box (lightbox type window).
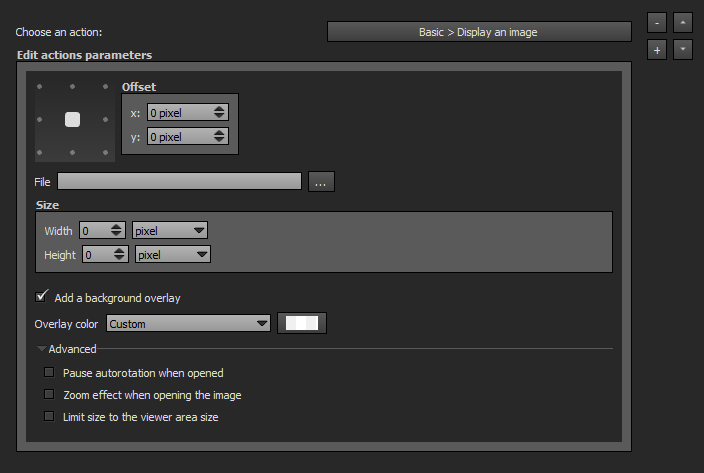
Position and offset
- Square with dots: Sets the position where you wish the image to be displayed. Available positions are top left, top center, top right, middle right, bottom right, bottom center, bottom left, middle left and center.
- Offset: X values adjust horizontal offset and y values adjust vertical offset based on the position you set.
File
Select the image file you wish to display by clicking on ![]() button. Supported files types are *.jpg, *.jpeg, *.png, *.gif and Flash files *.swf.
button. Supported files types are *.jpg, *.jpeg, *.png, *.gif and Flash files *.swf.
Size
- Width: Set the image width in pixels or percentage. If set to 0, image width is sized to its native resolution.
- Height: Set the image height in pixels or percentage. If set to 0, image height is sized to its native resolution.
Add a background overlay
When this checkbox is checked
- Overlay color: You can select the overlay color and opacity with the built-in color picker or select a project color in the dropdown menu. Project background color is defined in Project Properties > Color
Advanced
- Pause autorotation when opened: Checkbox to pause or not autorotation when action is triggered.
- Zoom Effect when Opening the Image: Checkbox to enable or not a zoom effect when the user clicks. Works only if width and height are set.
 Display a video
Display Video on iPhone On iPhones only, videos will be displayed in fullscreen mode
Display a video file in a modal box (lightbox type window).
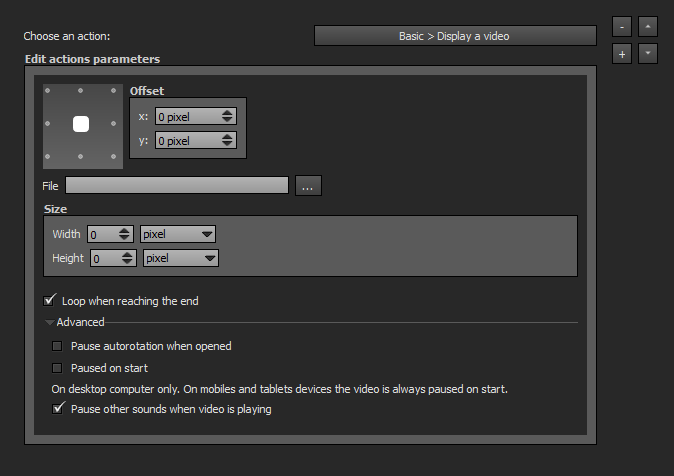
Position and offset
- Square with dots: Sets the position where you wish the video to be displayed. Available positions are top left, top center, top right, middle right, bottom right, bottom center, bottom left, middle left and center.
- Offset: X values adjust horizontal offset and y values adjust vertical offset based on the position you set.
File
Select the video file you wish to display by clicking on ![]() button. Supported files types are *.mp4, *.m4v, *.flv, *.webm, *.ogv, *.ogg.
button. Supported files types are *.mp4, *.m4v, *.flv, *.webm, *.ogv, *.ogg.
- Note: .flv is a Flash-only format
- Note: .mov format is unsupported.
Size
- Width: Set the video width in pixels or percentage.
- Height: Set the video height in pixels or percentage.
Loop
Checkbox to loop or not your video.
Advanced
- Pause autorotation when opened: Checkbox to pause or not autorotation when action is triggered.
- Paused on Start (on desktop computer): Checkbox to pause or not the video at start. This feature works only on desktop computers. On mobiles and tablets, the video is always paused on start.
- Pause other sounds when video is playing: Checkbox to pause or not other sounds while the video is playing. It mutes background sounds and all other sounds to let only the video sound playing.
Display a web video
Display a hosted web video (YouTube and Vimeo) in a modal box (lightbox type window).
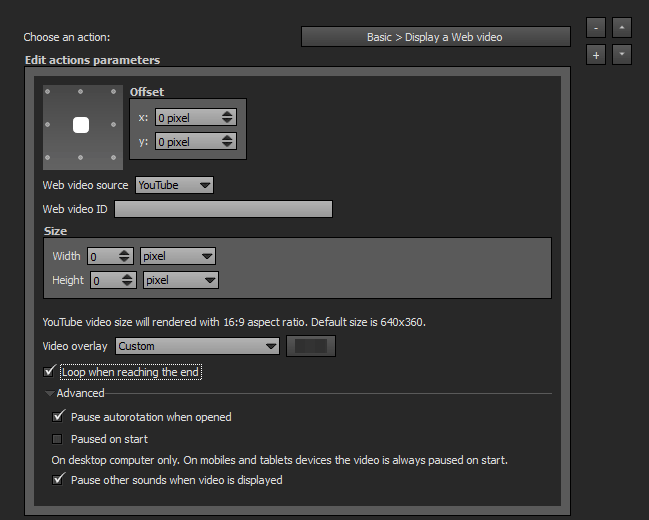
Position and offset
- Square with dots: Sets the position where you wish the video to be displayed. Available positions are top left, top center, top right, middle right, bottom right, bottom center, bottom left, middle left and center.
- Offset: X values adjust horizontal offset and y values adjust vertical offset based on the position you set.
Web Video Source
Select the video hosting service you wish to use. Compatible video hosting are:
- YouTube
- Vimeo
Web Video ID
In this field, enter only the ID of the video. For example:
- For a YouTube URL http://www.youtube.com/watch?v=xxHkVSGjBbM enter xxHkVSGjBbM
- For a Vimeo URL http://vimeo.com/110690554 enter 110690554
Size
- Width: Set the video width in pixels or percentage.
- Height: Set the video height in pixels or percentage.
Note that YouTube video size will render
Video Overlay
An opacity adjustable colored layer between your web video player container and the tour.
- Overlay Color: You can select the overlay color and opacity with the built-in color picker or select a project color in the drop-down menu. Project colors are defined in Project Properties > Color.
Loop when Reaching the End
Checkbox to loop or not the video when it reaches the end.
Advanced
- Pause autorotation when opened: Checkbox to pause or not autorotation when action is triggered.
- Paused on Start (on desktop computer): Checkbox to pause or not the video at start. This feature works only on desktop computers. On mobiles and tablets, the video is always paused on start.
- Pause other sounds when video is playing: Checkbox to pause or not other sounds while the video is playing. It mutes background sounds and all other sounds to let only the video sound playing.
Load next panorama
Loads next panorama based on the order of the Project Properties > Order.

Load previous panorama
Loads previous panorama based on the order of the Project Properties > Order.

Load next group
Loads next group based on the order of the Project Properties > Order.

Load previous group
Loads previous group based on the order of the Project Properties > Order.

Play a Sound
This action plays a sound on user click. Only mp3 files are supported.
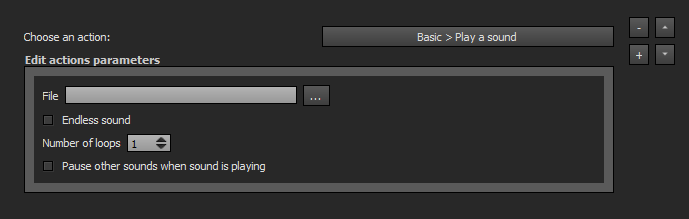
- File: Select the mp3 sound file to play on user click.
- Endless Sound: Checkbox to loop infinitely the mp3 sound. If not checked, you can specify the number of loops.
- Pause other Sounds when is Playing: When played, the sound file pauses all others sounds played (like background sounds for example).
Play a Directional 3D Sound (Flash Only)
This action plays a directional sound on user click. Only mp3 files are supported. The directional sound can only be applied on spots and is available only into the Flash Player. On HTML5 player or plugin, the sound will be played as a standard sound.
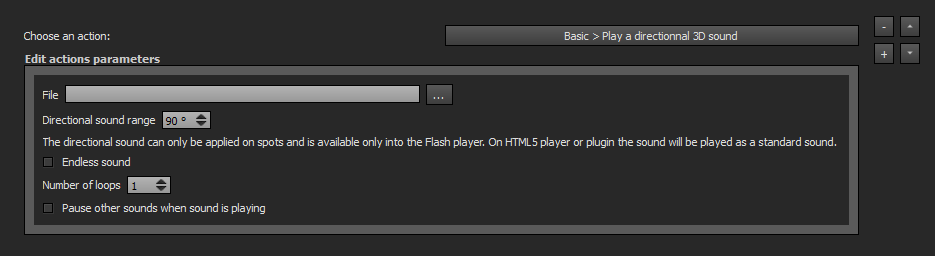
- Directional Sound Range: Enter the sound field angle you wish in degrees. 90° by default, recommended because it matches the human vision field of view. The more you enter a low value, the more you get a directional sound. When user drags the sphere with a sound hotspot into the zone, a realistic volume and stereo effect is heard according to the user movements, as it would be in a real situation. This feature is checked by default.
- Endless Sound: Checkbox to loop infinitely the mp3 sound. If not checked, you can specify the number of loops.
- Pause other Sounds when is Playing: When played, the sound file pauses all others sounds played (like background sounds for example).
Open a website
This actions behaves like a link you can open in your current browser window or in a new window.
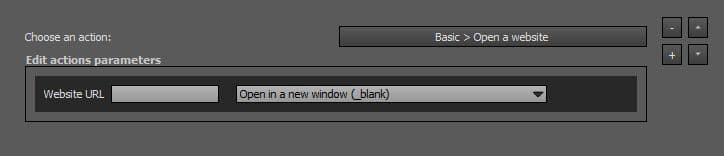
Website URL
Enter the URL you wish to link.
Target Window
Dropdown menu to choose how you wish to open the link.
- Open in a new window (_blank).
- Open in the current window (_self).
- Open in the parent frame (_parent).
- Open in the top-level frame in the current window (_top).
 Animation
Start Autorotation
Triggers start autorotation of the current view based on settings in Project Properties > Autorotation.

Stop Autorotation
Triggers stop autorotation of the current view. Autorotation settings are set in Project Properties > Autorotation.

Pause Autorotation
Pauses autorotation of the current view. Autorotation settings are set in Project Properties > Autorotation.

Resume Autorotation
Resume the automatic rotation of the view after a pause. Autorotation settings are set in Project Properties > Autorotation.

Start Autotour
Start automatic tour based on settings in Project Properties > Autotour.

Stop Autotour
Stop automatic tour. Autotour settings are available in Project Properties > Autotour.

View Control
Enter WebVR
Allows to enter the VR Mode. Works with the WebVR Button Plugin. No other properties for the moment.

Enter fullscreen mode
Triggers fullscreen mode display.

Exit fullscreen mode
Exit fullscreen mode display.

Switch fullscreen mode
Toggles between windowed display and fullscreen mode display.

Enable gyroscope
Activate gyroscope. This function works only if a hardware gyroscope device is detected.

Disable gyroscope
Deactivate gyroscope.

Set «Move To» control mode
In this mode, the mouse pointer indicates the direction to move to.

Set «Drag To» control mode
In this mode, the mouse pointer drags the tour.

Zoom in
Apply a zoom to the scene. It can be a zoom step or a defined zoom value in degrees to reach.
Zoom out
Apply a zoom out to the scene. It can be a zoom out step or a defined zoom out value in degrees to reach.
Move up/down
Apply a pitch change to the scene. It can be a pitch step or a defined pitch value in degrees to reach.
Move left/right
Apply a yaw change to the scene. It can be a yaw step or a defined yaw value in degrees to reach.
Look to
Apply a camera change to the scene. You can define the Yaw and Pitch directions an the update degrees value. The Fov can be change also (value in degrees) and a motion type (Smooth, Linear, Tween) can be applied to change the animation.
Set normal projection
Set normal projection mode.

Set fisheye projection
Set fisheye projection mode.

Set architectural projection
Set architectural projection mode.

Set stereographic projection
Set stereographic projection mode.

Set pannini projection
Set pannini projection mode.

Set Little Planet projection
Set Little Planet projection mode.

Set fisheye ball projection
Set fisheye ball projection mode.

Interface Control
Show Hotspots
Switch on the display of the hotspots of the tour.

Hide Hotspots
Switch off the display of the hotspots of the tour.

Show Tour Controls
Switch on the display of the tour controls.

Hide Tour Controls
Switch off the display of the tour controls.

Show Tour Thumbnails
Switch on the display of the tour thumbnails. Works only when a Thumbnails plugin is added to the tour.

Hide Tour Thumbnails
Switch off the display of the tour thumbnails. Works only when a Thumbnails plugin is added to the tour.

Display tour information
Switch on the display of tour information. This action is compatible only with plugins that receive its triggering like Description plugin. For example, you can assign Project Description / Group Description or Panorama Description field display.

Hide tour information
Switch off the display of tour information.

Show Map
Switch on the display of tour map. Works only with PanotourMaps Plugin.

Hide Map
Switch off the display of tour map. Works only with PanotourMaps Plugin.

Show Floor Plan
Switch on the display of floor plan. Works only with the Floor Plan Plugin.

Hide Floor Plan
Switch off the display of floor plan. Works only with the Floor Plan Plugin.

Triggers opening of the sharing tool (lightbox). Works with the Social Share Plugin.

Play tour sounds
Enable tour sounds. Tour sounds includes every sound of your tour excepting external embedded medias like YouTube or any other.

Stop tour sounds
Disable/Mute tour sounds. Tour sounds includes every sound of your tour excepting external embedded medias like YouTube or any other.

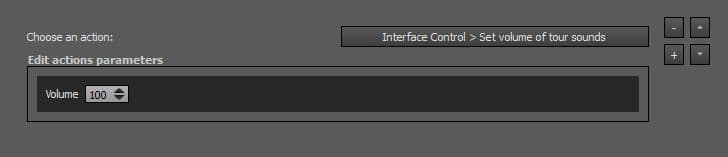
Set volume of tour sounds
Set the master level (0-100) of all tour sounds.
Advanced
These are advanced actions. As well as the default actions, any custom actions added to your User Directory will be added to Advanced section.
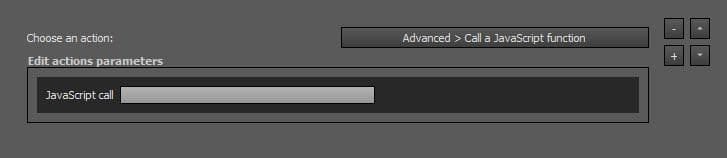
Call a JavaScript Function
Enter the call to the JS function you wish to use on the click.
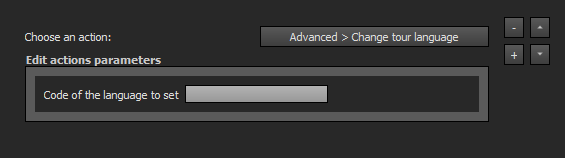
Change Tour Language
This action allows to change the current tour language to the desired language.
Just enter the target language code into the input field. See how to add and edit language files.
Actions and Plugins Connection Table
Actions in Panotour Pro are events that are assigned to any function in the plugins and the basic tools of the interface (Go to, Zoom, Move, Autorotation, etc). Most of actions parameters are set from «Actions triggered on click» menu but some actions may be adjusted in their target plugin. Here is the list of actions that are directly in relation with the included plugins.
| Action Type > Action Name | Plugins that interact with |
|---|---|
| View Control > Enable gyroscope | Gyroscope (iPhone 4 ou iPad 2) |
| View Control > Disable gyroscope | Gyroscope (iPhone 4 ou iPad 2) |
| Interface Control > Show Tour Thumbnails |
|
| Interface Control > Hide Tour Thumbnails |
|
| Interface Control > Display Tour Information |
Description |
| Interface Control > Hide Tour Information |
Description |
| Interface Control > Show Map |
PanotourMaps |
| Interface Control > Hide Map |
PanotourMaps |
| Interface Control > Show Floor Plan |
Floor Plan |
| Interface Control > Hide Floor Plan |
Floor Plan |
| Interface Control > Share Tour |
Social Share |
Plugin Specific Actions Sets [Plugin] «Plugin Name»
Depending on plugins you add to your tour, you may see contextual actions sets appear in the Actions list. Here is the list of these actions directly linked to their plugin, each action type starts with «[Plugin]»
[Plugin] Gallery
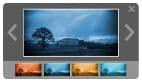
Action set related to the Gallery Plugin.
Open The Gallery
Triggers the opening of the Gallery Plugin.

Open The Gallery on a Specific Image
Triggers the opening of the Gallery Plugin and displays a specific image you select.

[Plugin] Floor Plan
Action set related to the Floor Plan Plugin.
Open the Floor Plan
Triggers the opening of the Floor Plan Plugin.

Close the Floor Plan
Triggers the closing of the Floor Plan Plugin.

Toggle Open and Close The Floor Plan
Toggles open and close the Floor Plan Plugin.

[Plugin] PanotourMaps
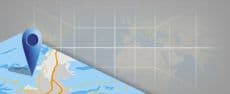
Action set related to the PanotourMaps Plugin.
Open the Map
Triggers the opening of the PanotourMaps Plugin.

Close the Map
Triggers the closing of the PanotourMaps Plugin.

Toggle Open and Close The Map
Toggles open and close the PanotourMaps Plugin.

[Plugin] Description
Action set related to the Description Plugin.
Display a Description
Triggers the opening of the Description Plugin in which description field is displayed. A description is one of the fields of

Display Current Spot Description
This action can only be assigned to an hotspot. It triggers the opening of the Description Plugin in which the description of the hotspot is displayed. Learn more about Hotspots.

[Plugin] PDF Box

Action set related to the PDF Box Plugin.
Display a PDF File
Triggers the opening of the PDF Box Plugin that will display a PDF file over your tour.
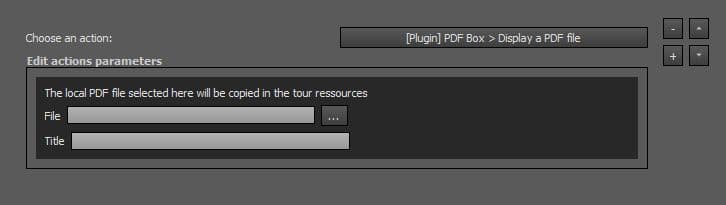
- File: Select the PDF file to display. Note that the local PDF file you select will be copied in the tour resources.
- Title: Enter a title for the PDF file document that will be displayed at the top of the of the modal lightbox window. Note that this function will be available only if «Show title» is enabled in PDF Box Plugin parameters.

Action set related to the Social Share Plugin.
Triggers the opening of the Social Share window.

Triggers the two state action of opening and closing of the Social Share window.

Triggers the closing of the Social Share window.

[Plugin] Web Video Box
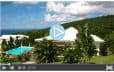
Action set related to Web Video Box Plugin.
Display a Video
Triggers the opening of the Web Video Box Plugin that displays a video over your tour.
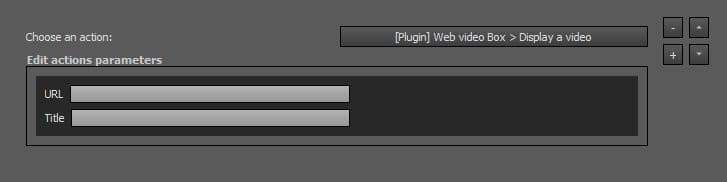
- URL: Enter the URL of the page containing the video. Do not enter the direct URL of the video (will not work) but use the url found in the embed code or iFrame instead. Video hosting website supported:
- YouTube
- Vimeo
- DailyMotion
- Wistia
- Viddler
- SoundCloud
- Title: Enter a title for the modal lightbox window that will be displayed. Note that this function will be available only if «Show title» is enabled in Web Video Box Plugin parameters.
[Plugin] Website Box
![]()
Action set related to the Website Box Plugin.
Display a Website
Triggers the opening of the Website Box Plugin that displays a website or HTML page over your tour.
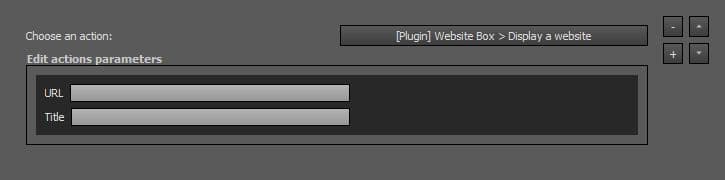
- URL: Enter the URL of the website page or path to your HTML file*.
- Title: Enter a title for the modal lightbox window that will be displayed. Note that this function will be available only if «Show title» is enabled in Website Box Plugin parameters.
* To link to a custom HTML file you can use a relative path such as:
- If they are in same directory as the tour's HTML file, the url would be like this : ./myHtmlFile.html
- If they are in a sub directory as the tour's HTML file, the url would be like this : ./mySubDir/myHtmlFile.html
- If you want to put your HTML files elsewhere, in a upper directory, you should use double dots : ../mydirectoryOverTheDirectoryOfthetour/myHtmlFile.html
Note: You will have to add the html file to your tour's data manually, if you create a PTV it will also have to be added by hand.