Panotour - Tour - Scene properties
Contents
Intro
This section displays properties and parameters in relation with the current selected scene. Since Panotour v2.5 you can import standard pictures panorama scenes (*.png, *.jpg, *.jpeg, *.kro, *.psd, *.psb, *.tif, *.tiff) and video panorama scenes (*.mp4, *.m4v, *.webm) files.
You can edit multiple scenes properties at once by Ctrl+Click (PC) / Cmd+Click (Mac) or selecting a area containing your panoramas with your mouse.
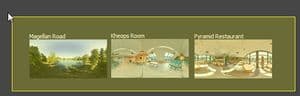
Selecting several scenes at once by dragging an area containing scenes with the mouse
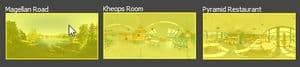
Selecting several scenes at once by clicking with the Ctrl key pressed
Name

![]() see on YouTube Name Properties
see on YouTube Name Properties
- Name: Here you can type your own name for the selected scene.
- By default a thumbnail is generated from your scene but you can select yours by clicking on the thumbnail.
- To reset the default thumbnail Shift+Click on it.
-
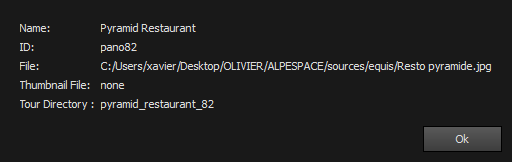
 Click on this icon to display the Panorama Informations:
- Name: The name entered for this panorama.
- ID: The unique identifier (panoID) assigned to this panorama (used in deep linking and with pano-specific plugins)
- File: The full path to the scene file for this panorama on your computer.
- Thumbnail File: If set, full path to the thumbnail scene file for this panorama on your computer.
- Tour Directory: Folder name into which the scene tiles will be exported (tiles are built only for pictures).
 Geolocalisation
(This feature requires an Internet connection).

![]() see on YouTube Geolocalisation Properties
see on YouTube Geolocalisation Properties
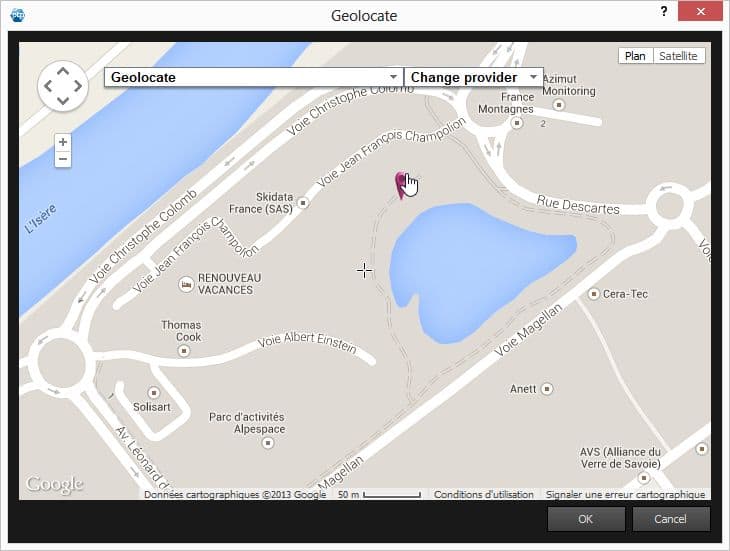
This property allows the selected scene to be geolocalised through different maps providers available:
- Google Maps
- OpenLayers Maps
To geolocalise your scene, you can either:
- Latitude: Manually enter Latitude of the current panorama.
- Longitude: Manually enter Longitude of the current panorama.
- Use the geolocate pointer tool included to place a marker on the map.
- To open the geolocate tool, click on the Globe Icon on the right.
- A popup window will open and you just have to search the place and click to mark it.
- You can drag and drop the marker.
- Generate an Hotspot Automatically: Displays a hotspot on the PanotourMaps Plugin (See more in Plugins Library).
Compatibility
The Geolocated spots will always use your default map spot style, you can not assign several spot styles to geolocated spots even if the interface seems to allow this.
Video Scene
(Available only when a video file is selected)
From Panotour Pro v2.5 onwards, you can import video panorama scenes (*.mp4, *.m4v, *.webm) in your projects.
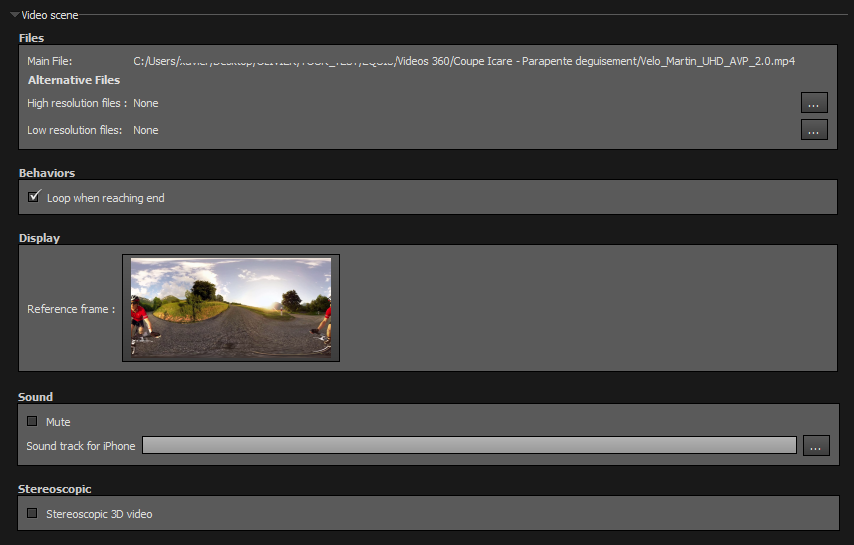
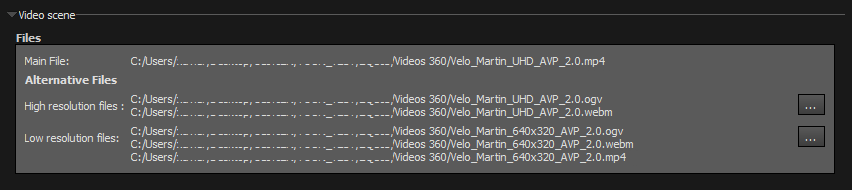
Files
- Main File: This is the path of the original video scene file you have imported
- High Resolution Files: For desktop computers. Select high resolution files by clicking on
 .
.
- Low Resolution Files: For mobiles, tablets and Safari browser. Select low resolution files by clicking on
Behaviors
- Loop when reaching the end: Checkbox to enable or not the playback loop. Checked by default, the video file playback is looped.
Display
This is the thumbnail for the video scene file. You can edit this thumbnail:
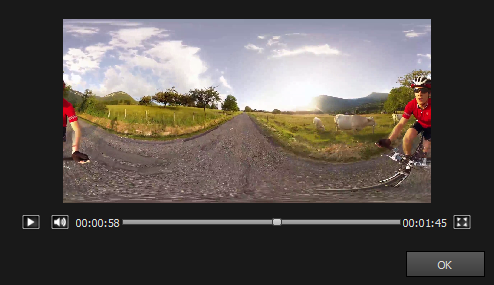
- Click on the thumbnail
- With the built-in player, seek until you get the video frame you wish to use as thumbnail for this video scene
- Click OK button
Sound
- Mute : Checkbox allowing you to mute the video's sound, if you want to add a different sound track for example.
- Sound track for iPhone : You need to add the soundtrack separately through this field, otherwise iPhones will not have any sound when viewing this scene. See Notions - Video Scenes Limitations.
Stereoscopic
- Stereoscopic 3D video Check this box if the video you input was a stereoscopic video. You will then be able to choose the format (top-bottom or side-by-side).
Compatibility
For more information about using Video scenes in your projects, have a look at this page: Notions - Video Scenes.
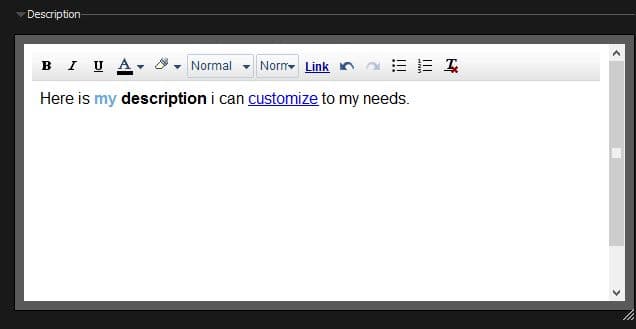
Description
![]() see on YouTube Description Properties
see on YouTube Description Properties
The Description field can be displayed in different ways. Even if description field is completed, you may not see it appear unless you call it through an action. To learn more about actions, see Plugins in the Style tab. Description contains a built in WYSIWYG Editor that can customize and add HTML features to your text like:
- Text formatting and style (Bold, Italic, Underline, Color, Font Family, Font Size).
- HTML features for enhanced text (Links, Unordered Lists, Ordered Lists).
- Undo/Redo function.
- Remove formatting function.
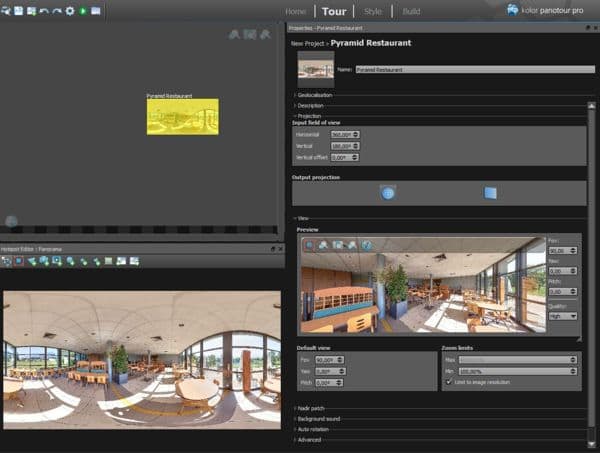
Projection

![]() see on YouTube Projection Properties
see on YouTube Projection Properties
By default, values are set to 360° for horizontal and 180° for vertical if width by height ratio of your image is 2.
- For ratio lower than 2
- Horizontal view will be set proportionally to the ratio compared with 360°.
- Vertical view will be set to 180°.
- For ratio higher than 2
- Horizontal view will be set to 360°.
- Vertical view will be set proportionally to the ratio compared with 180°.
Input Field of View
Anyway, you can manually adjust horizontal and vertical fields of view.
- Horizontal: Amount in degrees of horizontal Field of view of your scene.
- Vertical: Amount in degrees of vertical Field of view of your scene.
- Vertical offset: Offset between horizon in your scene and the vertical center of the scene file.
- If your scene get more sky than ground, set a positive vertical offset.
- If your scene get less sky than ground, set a negative vertical offset.
Output Projection
- Spherical: Suitable for most projects.
- Planar: If you wish to get a 2D planar projection.
- Polygon hotspots (+image, video, web content) are not fully supported on planar scenes, only on spherical scenes in HTML5.
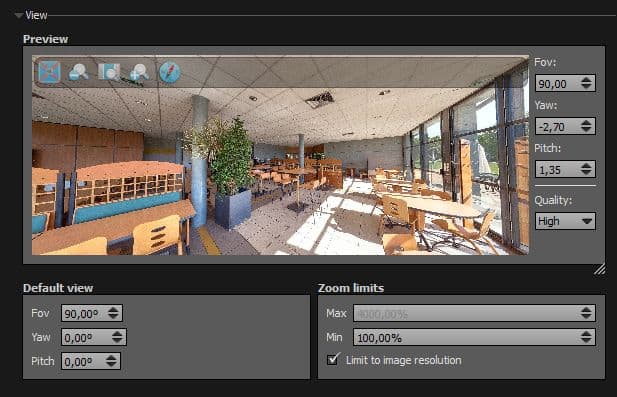
View
![]() see on YouTube View Properties
see on YouTube View Properties
Preview

- FOV: Field of View wished of your scene. By default, FOV is set to 90°, it is recommended to leave it as is, but you can set a different value if you wish.
- Lower values will close your field of view.
- Higher values will widen your field of view.
- YAW is the horizontal view position.
- Pitch is the vertical view position.
Icons Toolbar
-
 Fullscreen mode.
-
 Set minimal zoom.
-
 Set default view.
-
 Set maximal zoom.
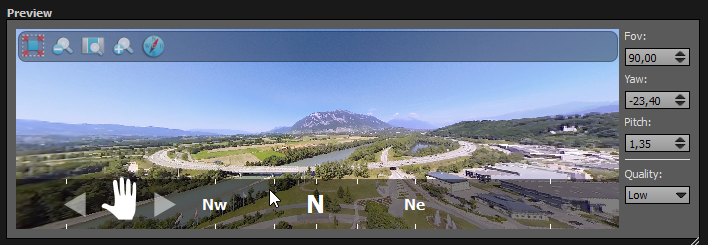
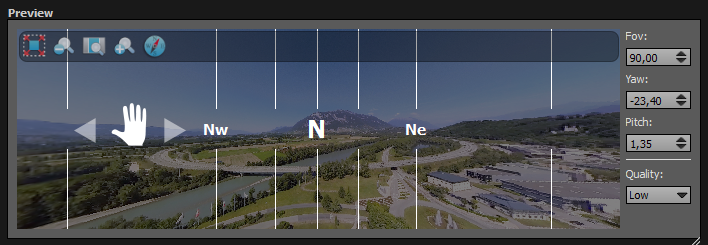
Compass: Orientate the Scene
![]() see on YouTube Compass Bar
see on YouTube Compass Bar
-
 Horizontal compass that allows to place the North or any cardinal direction:
- Click on the Compass icon to toggle on the display of the compass.
- Drag the compass bar to match cardinal point to the real cardinal point (North, East, South, West) into the scene.
Default View
This zone displays the current values of FOV, YAW and Pitch of the default view. It changes each time you click on the ![]() «Set default view» icon.
«Set default view» icon.
Zoom limits
- Max: Set the maximum amount of zoom. Deactivated by default when "Limit to image resolution" is checked.
- Min: Set the minimum of zoom.
- Limit to image resolution checkbox prevents not to exceed 100% zoom. Checked by default, it is recommended to leave it checked.
Nadir Patch

![]() see on YouTube Nadir Patch Properties
see on YouTube Nadir Patch Properties
Nadir is the lowest point of your sphere/projection. Some of your equipment may appear like tripods, tripods heads, etc. You can select a file to mask this zone you may not want to be seen, or simply display a copyright watermark.
- Supported nadir files types are: .png, .kro (Autopano file format), .psd (Photoshop file format), .psb (Photoshop Large Document format), .tif, .tiff, .jpg, .jpeg
- Scale: Percentage value that allows to scale your placed nadir file to your needs (100% is the maximum value).
- Orientation: Degree value that allows to rotate your nadir file to your needs (-180° to 180°).
Compatibility
- Nadir patch can't be applied on panoramas created by importing cube faces.
- Nadir patch can't be applied on panoramas that are less than 360x180°.
Background Sound

![]() see on YouTube Background Sound Properties
see on YouTube Background Sound Properties
Insert a background sound to your current scene. Note that if a background sound if set, it will replace the background sound set in the Project Properties. Only .mp3 files are supported.
Auto Rotation
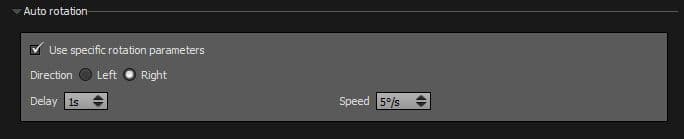
![]() see on YouTube Auto Rotation Properties
see on YouTube Auto Rotation Properties
Set up specific auto rotation parameters
- Direction: Radio button to specify if your auto rotation go to the left or to the right.
- Delay: Set the delay in seconds before the auto rotation starts.
- Speed: Set the number of degrees per second the auto rotation works.
Note that checking «Use specific rotation parameters» does not mean that auto rotation will necessarily start in this picture/panorama. It allows you to specify the settings of auto rotation and not its triggering.
Advanced

![]()
- Do Not Generate Tiles on Build: You can prevent the current selected panorama to be rebuilt: Really convenient feature to use when you don't want to rebuild a Gigapixel panorama. This advanced feature is quite useful to avoid Panotour to check big panoramas tiles in the export directory. This step can take a long time on big panoramas, or if your project contains a lot of panoramas. You can avoid this check, by telling Panotour not to generate its tiles when the button «Build» is pressed. Learn more about different build methods in Build > Tiles Generation Method.
- Embed/Remove in a Group: Click this button to place this panorama in a group or to remove it from a group.
BACK TO: Documentation / Panotour Documentation