Panotour - Tour - Project properties
Contents
Properties in relation with the current project. Most of parameters are default values that may be changed.
(FR-EN captions available)
Name
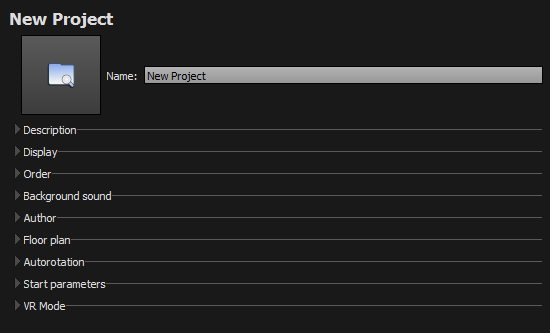
- Name: Here you can type your own title for the project.
- Thumbnail: No thumbnail by default but your can select yours by clicking on the icon thumbnail placeholder.
- Important note about social share: By default, if no thumbnail is selected, the thumbnail of the project is the very first panorama. If a thumbnail is set, it will be used as thumbnail for social share.
- To reset the thumbnail Shift+Click on it.
 Description
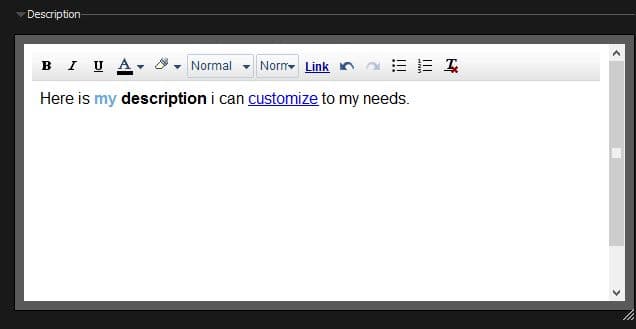
The Description field can be displayed in different ways. Even if description field is completed, you may not see it appear unless you call it through an action. To learn more about actions, see Plugins in the Style tab. Description contains a built in WYSIWYG Editor that can customize and add HTML features to your text like:
- Text formatting ans style (Bold, Italic, Underline, Color, Font Family, Font Size).
- HTML features for enhanced text (Links, Unordered Lists, Ordered Lists).
- Undo/Redo function.
- Remove formatting function.
Display
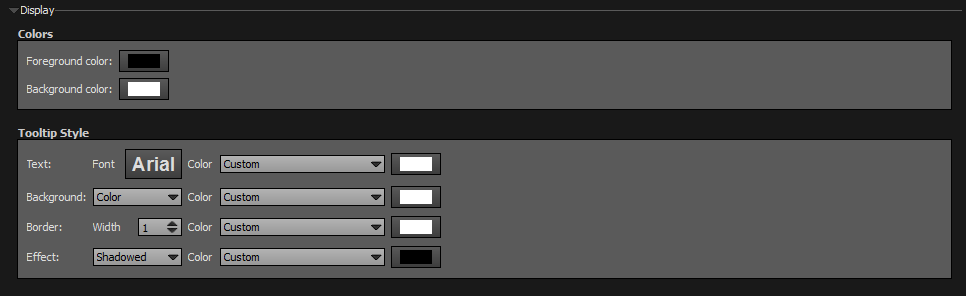
Colors
This area allows to set up a default foreground color and default background color for styling your tour. This swatch is useful when you are in Style Tab, you can quickly recall these colors on Plugins to match your theme colors.
- Foreground Color: You can select the default foreground color with the built-in color picker.
- Background Color: You can select the default background color with the built-in color picker.
Tooltips Style
In this area you can customize the default appearance of tooltips for your whole tour.
- Text Font: Click to open a window to customize font family, font size, font weight, font effect. Please see important notice about font style display.
- Text Color: You can select the font color and opacity with the built-in color picker.
- Background:
- None: No background color.
- Color: You can select the default tooltip background color with the built-in color picker.
- Border:
- Width: Enter the tooltip default width in pixels.
- Color: Select the default tooltip border color with the built-in color picker.
- Effect:
- None: No tooltip effect.
- Shadowed: Select the shadowed effect as default tooltip effect.
- Color: Select the default tooltip effect color with the built-in color picker.
Web Safe Font Families: Important Notice About Font Style
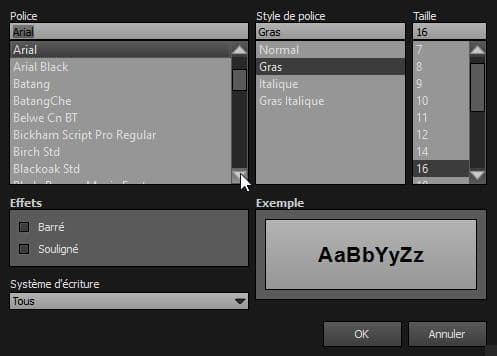
Please note that font you choose will may not display correctly on your users device. Font family you select has to be implemented on users computers/devices. Accordingly, prefer web safe font families like:
- Georgia, serif
- Palatino Linotype, Book Antiqua, Palatino, serif
- Times New Roman, Times, serif
- Arial, Helvetica, sans-serif (Recommended for readability and compatibility).
- Arial Black, Gadget, sans-serif
- Comic Sans MS, cursive, sans-serif
- Impact, Charcoal, sans-serif
- Lucida Sans Unicode, Lucida Grande, sans-serif
- Tahoma, Geneva, sans-serif
- Trebuchet MS, Helvetica, sans-serif
- Verdana, Geneva, sans-serif
- Courier New, Courier, monospace
- Lucida Console, Monaco, monospace
Order

This box displays the order that will be used in scenes/groups of scenes menus of your tour. This will define thumbnails order in your menus.
This is how it works:
- Simply drag n drop the items or click on thumbnails arrows
- Individual scenes and groups are separated
- Order indexes change automatically when you change the order
Background Sound

Insert a background sound to your project. Insert a background sound to your group.
- Click on
 button to select a sound file.
- This is the default background sound that will be played on every picture/panorama that doesn't have its own background sound.
- You can also select an individual background sound for each of your pictures/panoramas that will replace this one, see Picture/Panorama Properties.
- Only .mp3 files are supported.
Author

This information can be brought up in the Contextual menu.
- Name: In this field you can complete the Author's name of the tour.
- Homepage: This field must be an URL.
Floor Plan

The Floor Plan allows your visitors to easily and quickly know their current position in the tour and then make your tour more convenient to navigate through.
- You can assign a floor plan to each project and group of pictures/panoramas.
- You can add Hotspots to each floor plan.
- Image file format supported is *.png, *.jpg, *.jpeg, *.kro, *.psd, *.psb and *.tif
Add/Remove a Floor Plan
- To add a floor plan, click on the icon
 and select your file.
- To remove the floor plan, Shift+Click on the thumbnail.
- Now you can edit hotspots on your selected floor plan.
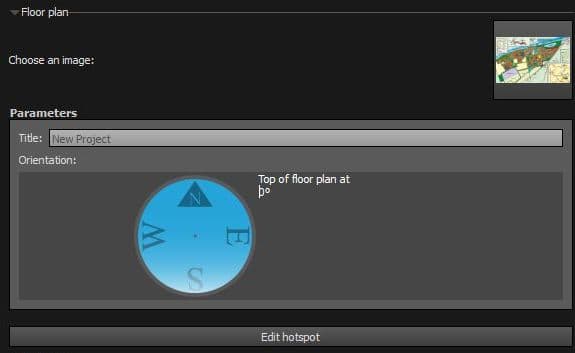
Parameters
- Title: Enter title text you wish to display on the window when your floor plan is opened. Leave empty if you don't want to display a title.
- Orientation: To orientate properly your tour, set the orientation of your floor plan. You have to know when the north cardinal point is oriented on your floor plan. This value is important especially for radar view. To orientate your picture/panorama, drag the compass to match the orientation of your floor plan.
Add/Remove Hotspot in Floor Plan
Through Floor Plan Hotspot Editor you can add Point hotspots in your floor plan and style your own map spots in Style tab. You can also add a Radar on your point spot with the Floor Plan Plugin.
Autorotation Autotour
This is for setting the general Autorotation or Autotour parameters for your project. Changing these settings will not start rotation for your project. To do so you must activate it in the Start Parameters.
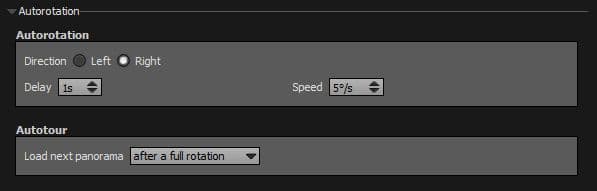
Autororation
Here you can set up the default auto rotation parameters:
- Direction: Radio button to specify whether your auto rotation go to the left or to the right.
- Delay: Set the delay in seconds before the auto rotation starts.
- Speed: Set the number of degrees per second the auto rotation works.
Autotour
Determines the behavior of your project about the loading of the next panorama:
- After a Full Rotation: Loads next picture/panorama when a whole 360° autorotation is completed. Inactive when autorotation is not enabled.
- After n Seconds: Loads next picture/panorama after a specified number of seconds you can select (from 1 second to 600 seconds).
Start Parameters
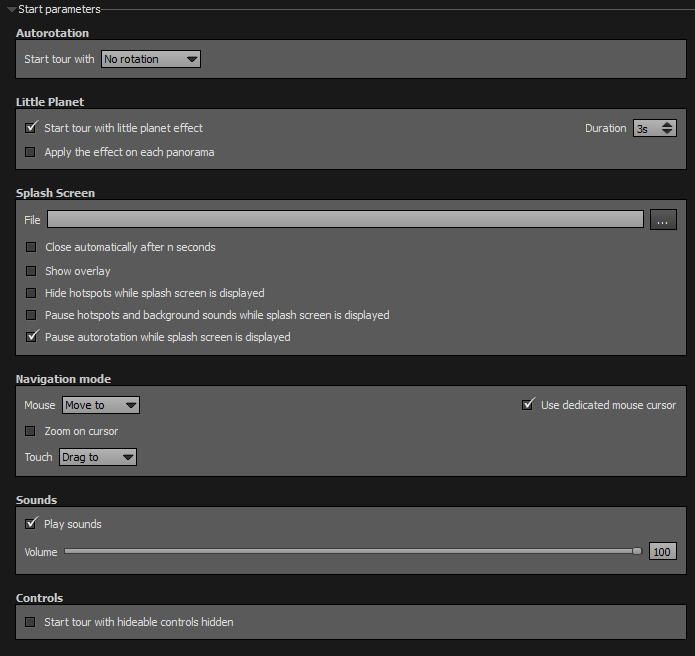
Autorotation
- Make a choice how you wish the tour to be started:
- No Rotation: Your tour starts without autorotation.
- Autotour: Your tour starts using Autotour parameter.
- Autorotation: Your tour starts with autorotation parameter.
Little Planet

This function makes a fancy and immersive animation to introduce your tour. Start from a little planet and automatically go to your customized projection position. This makes an incredible zoom effect.
It requires a full 360°x180° spherical panorama as a starting image to work.
- Checkbox lets you choose to start or not with the little planet projection.
- You can specify the duration of the effect.
- Checkbox lets you choose wether you wish to apply the effect on each panorama.
Note: Starting with little planet projection may increase significantly the page load time.
Splash Screen

In this field you can optionally add a splash screen to your tour. Your splash screen is displayed when the tour starts. Image file supported .png, .jpg, .jpeg and *.gif
- File: To select a splash screen, double click on the form field or click on button.
- Close Automatically after n Seconds: Checkbox to enable or not the closing of the splash screen after a determined lap of time.
- Duration: Enter the number of seconds you wish the splash screen lasts.
- Show Overlay: Checkbox to display or not a customizable color overlay between the splash screen and the tour.
- Color: Select the overlay color with the built-in color picker.
- Hide Hotspots while Splash Screen is Displayed: Checkbox to display or not the hotspots while the splash screen is visible.
- Pause Hotspots and Background Sounds while Splash Screen is Displayed: When checked, hotspots are hidden and background sound is muted while the splash screen is visible.
- Pause Autorotation while Splash Screen is Displayed: Checkbox to pause or not the autorotation while the splash screen is visible.

- Mouse and Touch Navigation Modes: Determines the behavior of your mouse on click down on touch devices (Android, iPhone, iPad, etc) and desktop:
- Drag To: Drag n drop type behavior. On click down, the panorama sphere follows your mouse movements.
- Move To: From the point you click down, you move through the panorama sphere according to the position between your click down and your current position. The more your mouse is away from this point, the more you get speed in your movements.
- Use Dedicated Mouse Cursor: Checkbox to enable or not the special cursor dedicated to Panotour virtual tour.
- Zoom on Cursor: Check to enable the zoom pointing according to the mouse cursor.
Sounds
- Toggle on or off sounds when tour starts. This includes background sounds and hotspots sounds.
- Note that sounds can be switched on or off later with Control Bars and other Plugins.
Controls
- Start Tour with Hideable Controls Hidden: Checkbox that allows to hide controls which can be hidden.
VR Mode
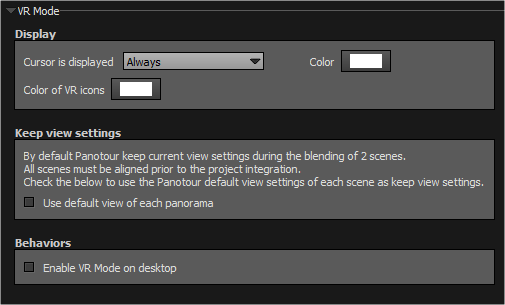
These are the VR Mode specific settings in the Project Properties, see the full documentation on VR Mode here.
Display
- Cursor is displayed: Select how the cursor has to be displayed:
- Always
- When hovering spots
- Never
Keep view settings
In VR Mode your scenes need to all have been aligned during stitching. Enable this option to use the default view of your scenes as a new north.
Behaviors
- Enable VR Mode on desktop: Unchecked by default. Web VR commands are displayed only on mobile device or compatible browsers. Check this box if you wish to force the display of VR mode on desktop computer (for internal testing purposes only).
BACK TO: Documentation / Panotour Documentation