Panotour - Tour tab
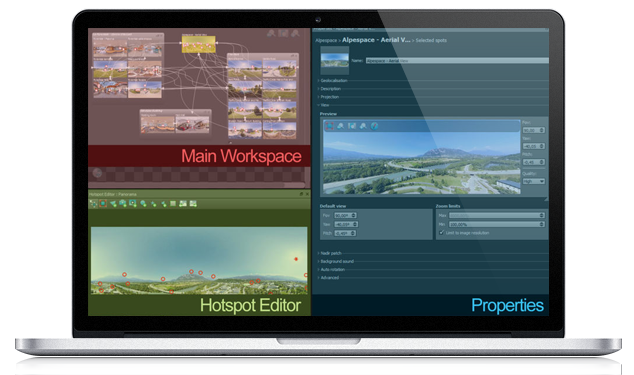
The Tour Tab is one of the 3 main areas. In this area you can make interactions, link your Scenes (pictures or videos panoramas), assign Actions and enter properties to your tour.
The Basics
Managing your scene, use top right icons to
- Zoom in Ctrl+(+) (PC) / Cmd+(+) (Mac).
- Zoom out Ctrl+(-) (PC) / Cmd+(-) (Mac).
- Auto adjust your scene to the Main Workspace Ctrl+0 (PC) / Cmd+0 (Mac).
- Use mouse wheel to zoom in or zoom out.
- Drag the mouse holding the click down to move across the panorama.
- Use top right icons to Go to previous or next Panorama of your project.
Selection
- Click to select a scene.
- Ctrl+Click (PC) / Cmd+Click (Mac) to select several scenes.
Editing in the Main Workspace
- Create groups of scenes using right click on panoramas. You can select multiple scenes holding down Ctrl key (PC) / Cmd key (Mac) and group them with Ctrl + G (PC / Cmd + G (Mac).
- You can drag and drop scenes into groups.
- Link hotspots to pictures/video scenes: Hold down click on the hotspot and drag the mouse to the picture/video scene you wish.
- Remove hotspots right clicking on it and select Delete.
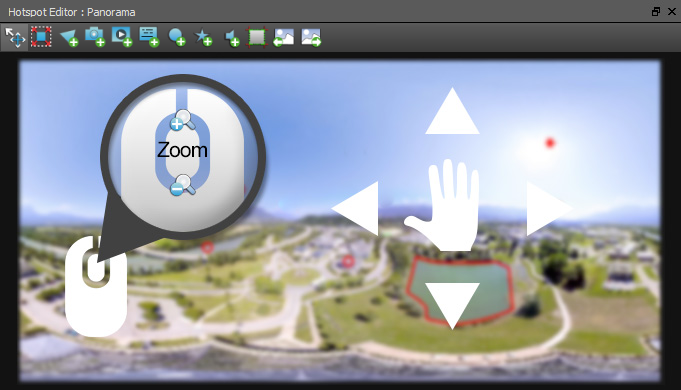
Editing in the Hotspot Editor
- Add/Remove/Edit hotspots.
- Add/Remove/Edit images in the sphere.
- Add/Remove/Edit video in the sphere.
- Add/Remove flare in the sphere.
- Add/Remove/Edit sound in the sphere.
- Crop your picture/video scene.
Main Workspace
You create the structure of the tour:
- Add Scenes.
- Link pictures/panoramas between them with the Hotspot Editor.
- Edit Scene Properties.
- Edit Group Properties.
- Edit Project Properties.
- Edit the Map with the Web Map Hotspot Editor.
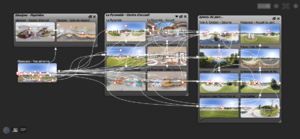
Main Workspace
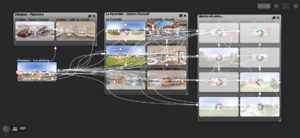
Example of a Project that is loading
Quick Search
Since Panotour v2.5 you can quickly search and find scenes. Just type few letters in the search form and the scenes that match your query are highlighted.
Icons
-
 Means that a hotspot is generated automatically on the Map in Picture/Panorama Properties > Geolocalisation (Displays only if the scene is geolocalized). Click to toggle enable/disable.
-
 Means no automatic hotspot is generated on the Map. Click to toggle enable/disable.
-
 Means that a description in thePicture/Panorama Properties, Group Properties or Project Properties is set.
-
 Means that a Project Floor Plan or Group Floor Plan is set in the project or the group.
-
 Point Spot Icon. You can click it and drag it to the scene or group you wish to link.
-
 Polygon Spot Icon. You can click it and drag it to the scene or group you wish to link.
-
 Picture Spot, Video Spot Icon and Web Content Spot. You can click it and drag it to the scene or group you wish to link.
-
 Click this icon top open the Web Map Hotspot Editor.
Zooming and Moving
- Ctrl +: Zoom In.
- Ctrl -: Zoom Out.
- Ctrl + 0: Zoom 100%.
- Space bar + Click: Move across the Main Workspace.
Grouping
You can merge scenes (pictures or video panoramas) into groups. Groups are useful to organize your tour, especially when your project contains lot of scenes. Groups allows to build a structured tour organization and prioritization.
- To embed scenes into a group:
- Select scenes to embed and right click on it. Choose Merge in a Group.
- Select scenes to embed, drag & drop all the scenes selected into one of them.
- To remove scenes from a group:
- Select scenes you wish to ungroup and right click on it. Choose Unmerge of the Group.
- Select scenes you wish to ungroup from the group, drag & drop all the scenes selected out of the group.
Group resize
Since Panotour v2.5 you can resize your groups easily: Use the bottom right corner and drag it to resize the entire group block to your needs.
Contextual Menu
Menu items that appear when you right click on the Main Workspace.
- Delete: Delete the selected scene(s).
-
 Duplicate: Make a copy of the current scene.
- Merge in a Group: Embed the selected scene(s) into a group.
- Unmerge of the Group: Remove the selected scene(s) from their current group.
- Replace Panorama File: Instead of deleting and adding again, this function allows to replace a scene without disturbing the project.
- Select in Explorer: Opens your operating system file explorer containing your selected scene (works only for one file selected).
- Link:
- Show all Links: Displays arrows links between all scenes containing a spot redirecting to them.
- Hide all Links: Hides arrows links between all scenes containing a spot redirecting to them.
- Show Links for Current Only: Displays arrows links only between the selected scenes.
- Spot:
- Show all Spots: Displays spots in all scenes.
- Hide all Spots: Hides spots in all scenes.
- Show Spots for Current Only: Displays spots only in the selected scenes.
Hotspot Editor
This is the Tour area where you manage your hotspots, interactions and actions assignments with the:
Properties
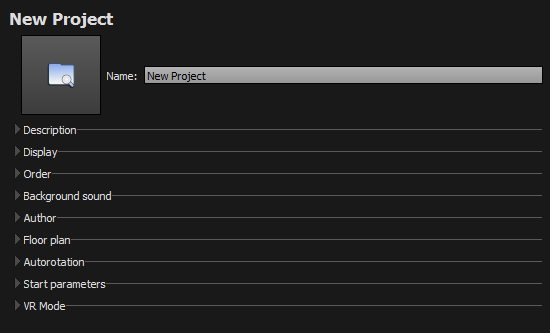
This section changes according to your selection in the main workspace or the hotspot editor.
BACK TO: Documentation / Panotour Documentation