Panotour - Interface overview
Contents
Panotour Pro (PTP) 2.0 offers a new interface, in order to help the workflow of photographers and tour creators.
The Basics
- In the Main Workspace, managing your scene, use top right icons to
- Zoom in Ctrl+(+) (PC) / Cmd+(+) (Mac).
- Zoom out Ctrl+(-) (PC) / Cmd+(-) (Mac).
- Auto adjust your scene to the Main Workspace Ctrl+0 (PC) / Cmd+0 (Mac).
- In the Hotspot Editor:
- Use mouse wheel to zoom in or zoom out.
- Drag the mouse holding the click down to move across the panorama.
- Go to previous or next Panorama of your project.
Selection
- Click to select a picture/panorama/video.
- Ctrl+Click (PC) / Cmd+Click (Mac) to select several pictures/panoramas/videos.
Editing
- In the Main Workspace:
- Create groups of pictures/panoramas/videos using right click on panoramas. You can select multiple pictures/panoramas/videos holding down Ctrl key (PC) / Cmd key (Mac).
- You can drag and drop pictures/panoramas/videos into groups.
- Link hotspots to pictures/panoramas/videos by holding down click and dragging the mouse to the picture/panorama/video you wish.
- Remove hotspots right clicking on it and select Delete.
- In the Hotspot Editor:
- Add/Remove/Edit hotspots.
- Add/Remove/Edit images in the sphere.
- Add/Remove/Edit video in the sphere.
- Add/Remove flare in the sphere.
- Add/Remove/Edit sound in the sphere.
- Crop your panorama/picture/video.
Tabs Menu
![]()
This is one of the brand new features of Panotour Pro 2. The main idea is to gather main steps of the creation of a tour. Tour and Style will be the tabs you will use most often.
Home
Landing aera of Panotour Pro 2, in this window you can:
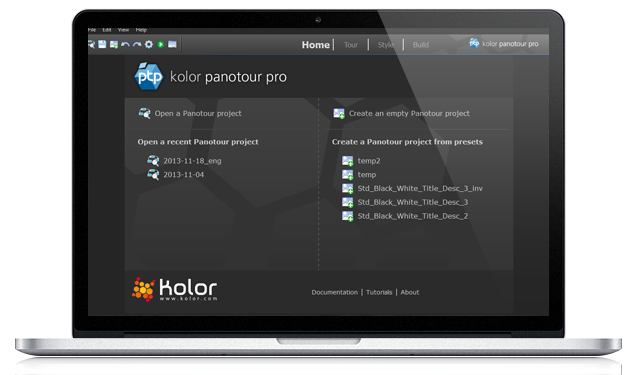
- Open a project tour.
- Open a recent Panotour project.
- Create an empty Panotour project.
- Create a Panotour project from presets.
- Go to online documentation, help and tutorials.
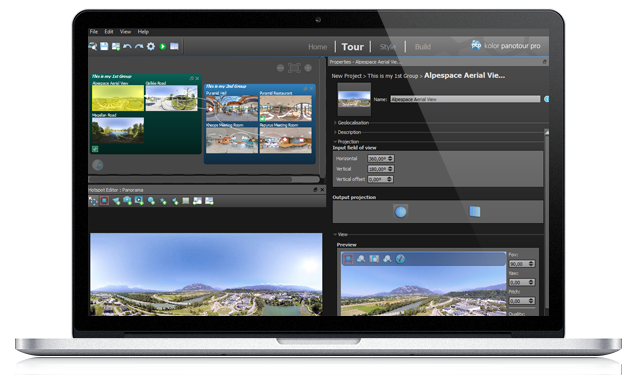
Tour
In the Tour Tab you can add some information of the project, mainly those that will/could be displayed inside the tour. You create the structure of the tour, by adding panoramas, placing hotspots, and linking the panoramas between them. The Tour Tab gathers the following sections:
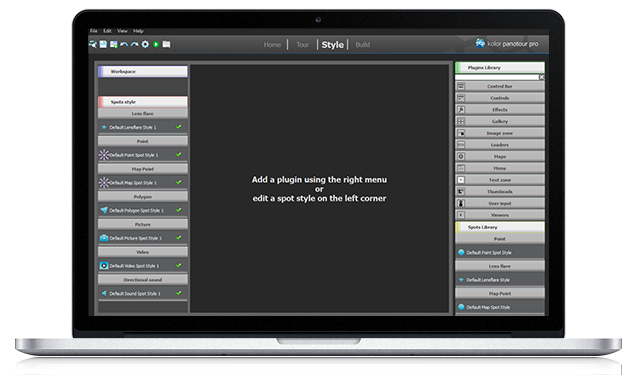
Style
In the Style Tab you apply some graphical customization and activate the interactive functions of the tour. The Style Tab gathers the following sections:
Build
In the Build Tab you export files and choose options for the tour: Devices, players, export directory. The Build Tab gathers the following sections:
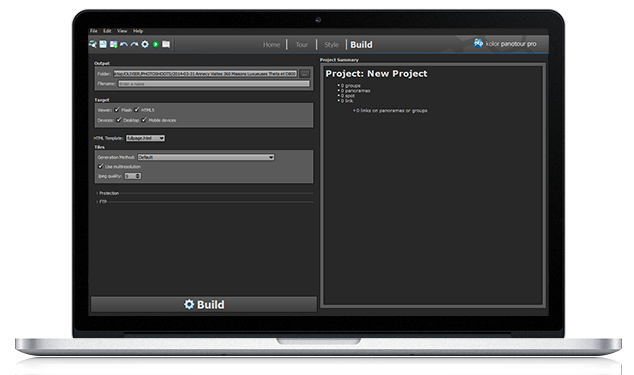
- Output Paths and Names
- General Properties of the Export
- Protection Properties of the Export
- FTP Feature
- Project Summary
File Menu
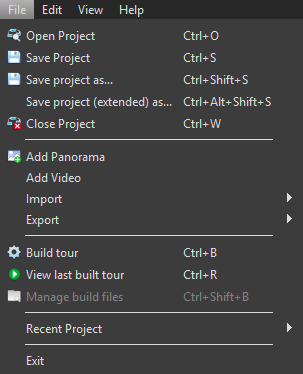
Open Project
- Open an existing Panotour project .kpt (Ctrl + O).
Save Project
- Save Project (Ctrl+S): Save current project.
- Save Project as... (Ctrl+Shift+S): Save current project as another file name and/or directory. Assets files like graphic files, video files and multimedia files associated to the project will not be copied in the destination directory.
- Save Project (Extended) as... (Ctrl+Alt+Shift+S): Save current project as another file name and/or directory. Assets files like graphic files, video files and multimedia files associated to the project will be copied in the destination directory.
- When you save a project, you save get two files:
- A ".kpt" file, like before, containing all the source data of the project and all its parameters.
- A ".cache" file. This new file contains contains some optional data used during the load of a project and during the build of a tour, drastically reducing the loading time of a project.
Close Project
- Close Project (Ctrl+W): Close the current project.
Add Picture Scene
- Add Panorama: Add a Picture/Panorama or several pictures/panoramas at once. This can be a full 360° image or partial 360° image.
Add Video Scene
- Add Video Scene: Add a Video or several videos at once. This can be a full 360° video or partial 360° video.
Import
- Sub menu that allows to Import Cube Faces
- Sub menu that allows to Import LivePano (Ctrl+L)
Export
- Cube Faces: Sub menu that allows to Export Cube Faces. By default, all panoramas included in the current project are selected.
- Panoramas: Sub menu that allows to Export Panoramas. By default, all panoramas included in the current project are selected.
Build Tour
Build current tour (Ctrl+B), render the current project. Further settings can be edited in the Build Tab.
- View Last built tour (Ctrl+R): Launch/Run the last build project.
- Manage Built Files (Ctrl+Shift+B): Project File Manager. Reduces size of exported tour files by deleting obtrusive unnecessary files.
- Recent Project: List of recently used Panotour Pro Projects .kpt
Edit Menu
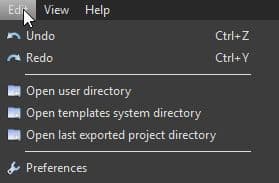
- Undo (Ctrl+Z): Undo your last action.
- Redo(Ctrl+Y): Redo your last action.
- Open User Directory: Open your operating system file explorer to manage your personal user Actions, HTML, Plugins, Presets, Spots, Transitions.
- Open Templates System Directory: Open your operating system file explorer to manage the default plugins provided in Panotour.
- Open Last Exported Project Directory: Open your operating system file explorer to the root of your last generated project.
- Preferences: Open Panotour Preferences settings window.
View Menu
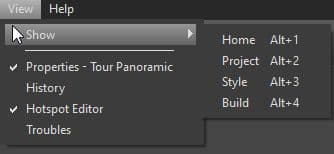
- Show: Sub menu that allows to toggle between Panotour Tabs.
- Properties: Toggle display of Scene Properties, Group Properties or Project Properties (only on Tour Tab window).
- Hotspot Editor: Toggle display of Hotspot Editor (only on Tour tab window).
- History: Toggle display of your operations History in the project from the last Panotour start.
- Troubles: Toggle display of Troubles which is a log list of conflicts in the current project you may have to fix to render properly.
Help Menu
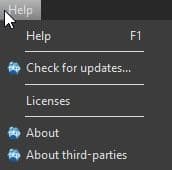
- Help (F1): Displays a window with links to all Panotour documentations and Kolor support.
- Check for updates: Ask the Kolor online server to check your version of Panotour is up to date.
- Licenses: Displays a window with the different licences activated/not activated of Panotour Pro, LivePano and Branding Free License. From here you can also extract your KRPano licence.
- Learn more about Registration.
- About: Displays the splash screen with all the credits of Kolor Panotour Pro.
- About third-parties: Displays a dialog window with all the credits of the third-party plugins used in Panotour Pro.
Icons Toolbar
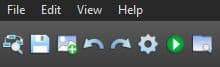
![]() Open an existing project .kpt
Open an existing project .kpt
![]() Save the current project.
Save the current project.
![]() Add a Scene Add a panorama scene that can be a full/partial 360-degree video or image.
Add a Scene Add a panorama scene that can be a full/partial 360-degree video or image.
![]() Undo.
Undo.
![]() Redo.
Redo.
![]() Build, render the current project. Further settings can be edited in the Build Tab.
Build, render the current project. Further settings can be edited in the Build Tab.
![]() View last built tour in a built-in local web server.
View last built tour in a built-in local web server.
![]() Project File Manager. Manage built files. Reduces size of exported tour files by deleting obtrusive unnecessary files.
Project File Manager. Manage built files. Reduces size of exported tour files by deleting obtrusive unnecessary files.
BACK TO: Documentation / Panotour Documentation